Free templates & patterns
130+ freebies are waiting in the Haunted Library
Templates, patterns and printables for every project on the blog.
Formerly Making Make Believe · Join the Haunted Library

Of all the Halloween spectacles we’ve conjured up over the years, our Witches Ball still reigns supreme in my haunted heart. We transformed the ballroom of a former Catholic women’s college into a haunted gala, the location itself secret – revealed only through a series of scavenger-hunt clues sent to each invitee – because nothing delights me more than a little theatrical pageantry before the doors even creak open.
I donned an orange and black two-piece gown with an orange wig and a boa-trimmed witch hat – festive, comfortable, and perfectly serviceable for a hostess darting between spellbound guests. But if there’s one thing seasoned Halloween devotees know, it’s this – we’re always plotting the next evolution.
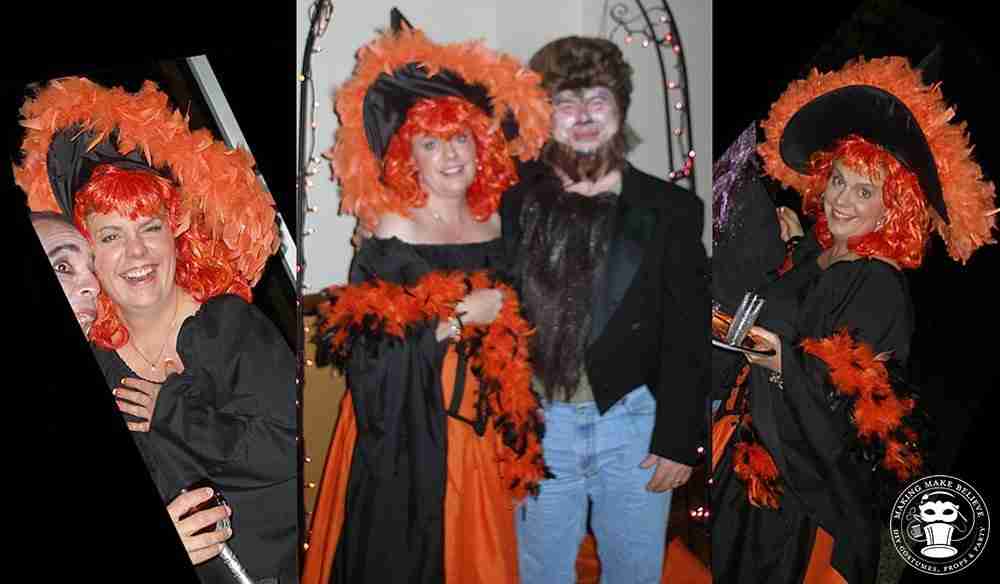
If I were ever to revisit one of our many themes, this one would be at the top of the list, but I would do the costuming a bit differently. My gown would get a decadent uplevel, complete with more opulent fabric with elaborate trims. And, inspired by the pre-Lenten celebration in Venice, Italy, known as Carnevale di Venezia, I’d incorporate an ornate masquerade mask. Because truly – what is a proper ball without a whisper of secrecy and a bit of mystery?
While I don’t have immediate plans to jet off to Carnivale of Venice, any self-respecting Halloween fanatic knows it’s only a matter of time before an invitation to a local spooky soirée materializes. And when it does, I refuse to be caught unadorned.
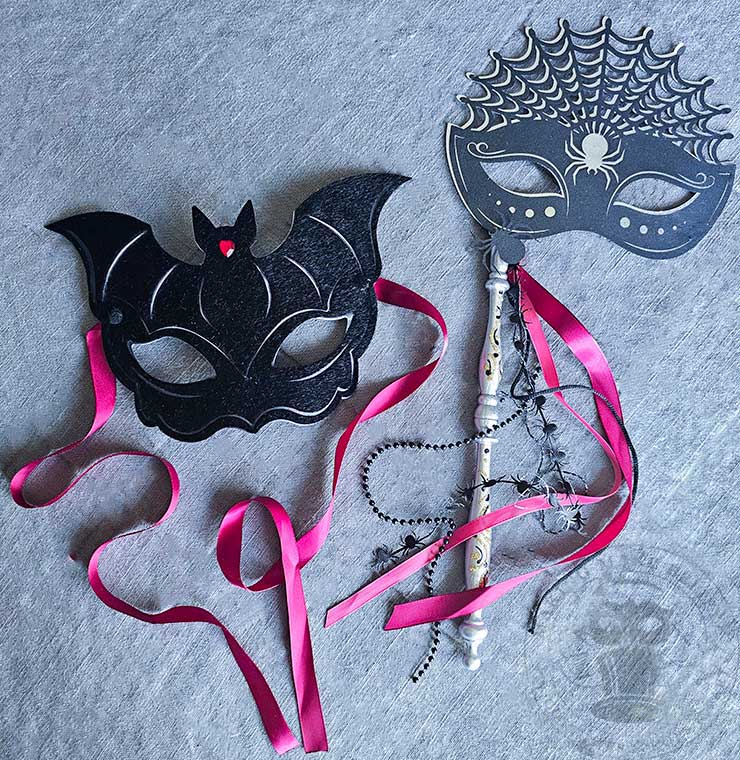
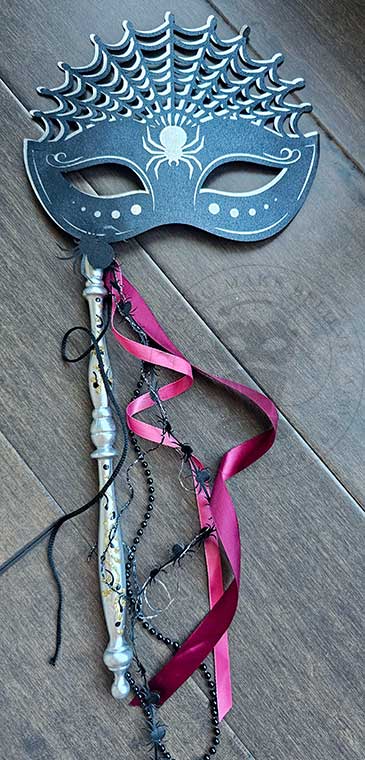
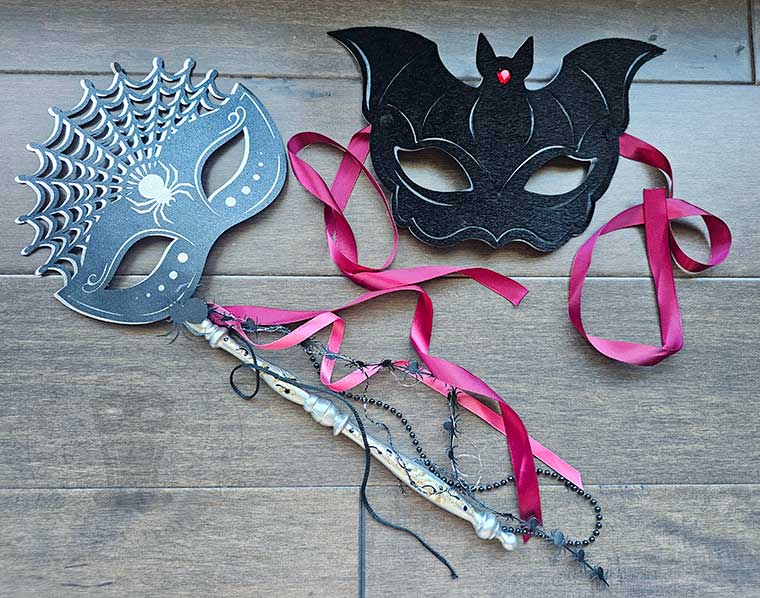
So, I designed a pair of masks that can be fashioned at a moment’s notice. Constructed from specialty papers, they are perfect for that last-minute costume fix, and, if time allows, they can be dressed up further with interesting materials and embellishments, making your grand entrance unforgettable.
So, if the Halloween Ball or a Gothic Gala is in your haunted future, this project is for you.
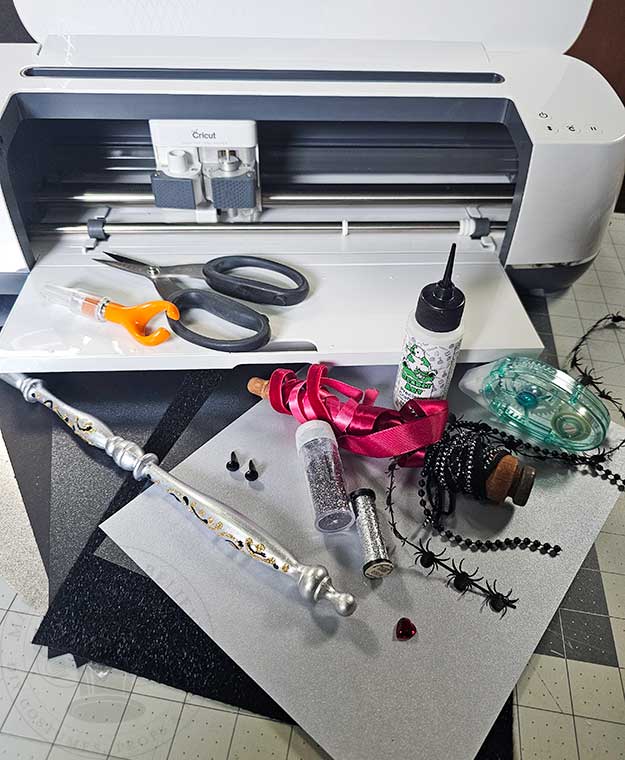
For this project, we will need:
Specialty paper cardstock (glitter cardstock, faux horse hair felt, foil cardstock, etc.)
Scissors or a cutting machine – I’m using the Cricut Maker
Adhesives (appropriate for your material choices)
Ribbon, Venetian mask stick, or dowel
Brad fasteners (for ribbon tie back option)
Embellishments (ribbons, trims, gemstones, glitter, etc. – optional)
We will also need the Gothic Gala Masquerade Mask files from the Haunted Library. This download contains the cut files for the two-layer spider crown mask and the three-layer bat mask. Select the PDF for hand-cutting or the SVG for machine-cutting.
If using the PDF to hand-cut your mask pieces, open the Gothic Gala Masquerade Mask PDF file in your favorite reader (Adobe, Foxit, etc.) and print the pages needed for the mask(s) you want to make. Cut out the template pieces.
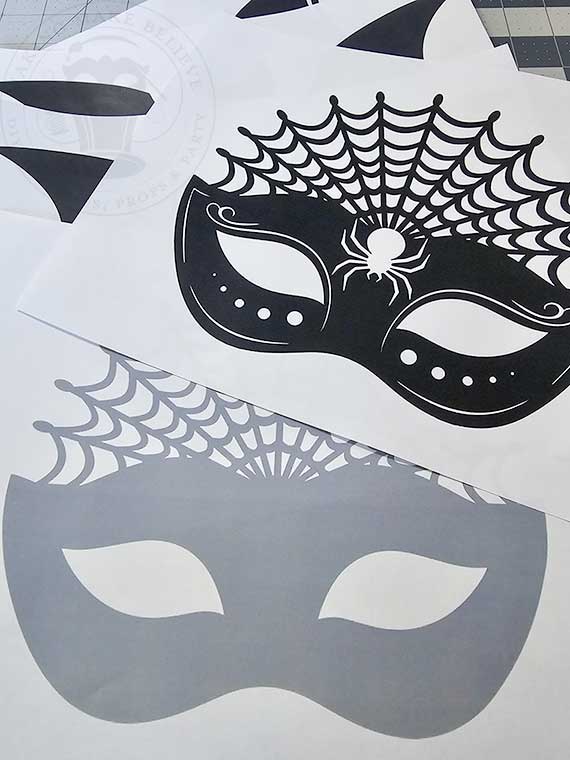
To use the Gothic Gala Masquerade Mask SVG cut file, upload it to your favorite design software, such as Cricut Design Space.
Ensure that the mask measurements are as follows:
Gothic Gala Masquerade Mask Measurements
Spider Crown 8.068″ x 6.82″
Bat Mask 10.668″ x 6.55″
If resizing is required, leave all layers of each mask grouped prior to resizing so the layers will align when cut out.
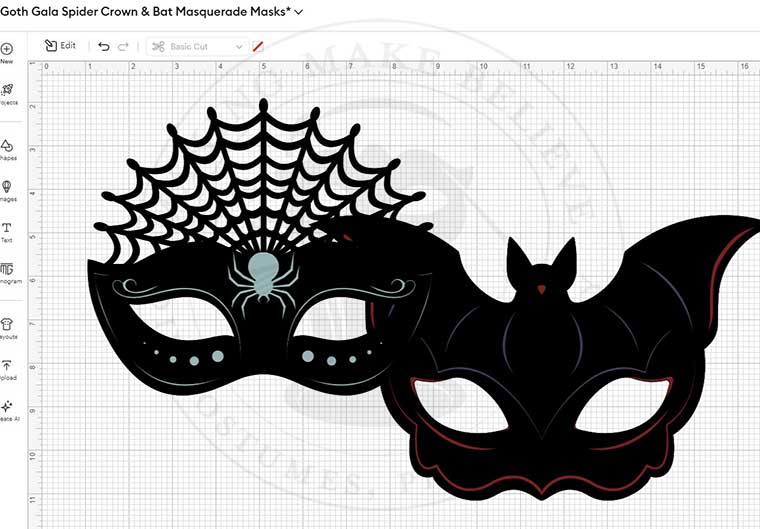
Trace each mask layer onto a different color of cardstock using your templates and cut them out. For more intricate areas, consider using a finger-blade tool for easier access and better control. Optionally, skip the intricate cutouts and instead replicate the details with glue and glitter.
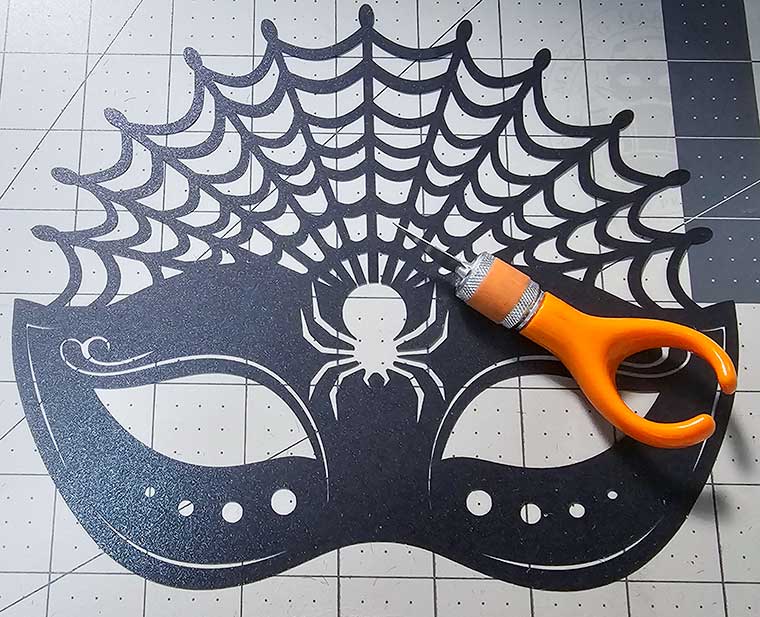
Cut each layer of your mask from a different color of cardstock or mix different materials.
I found some faux horse hair felt in my stash. I’ve never used this material before, so I was anxious to see if it would work well for this project. (Stand by for results.)
If you would like to play with this material, below are the settings I used on my Cricut Maker:
Cricut Maker Material Settings for Faux Horse Hair Felt Sheet
Fabric face up
Fabric Grip cutting mat
Rotary blade
Material setting: Faux Suede (rotary blade tool option)
More pressure
As always, do a tiny test cut, such as a 1/4″ star or circle, before making your final cut.
Before unloading your mat, ensure the cut is completely through the fabric. If not, do not unload the mat; instead, press the “Go” button again to force another pass.
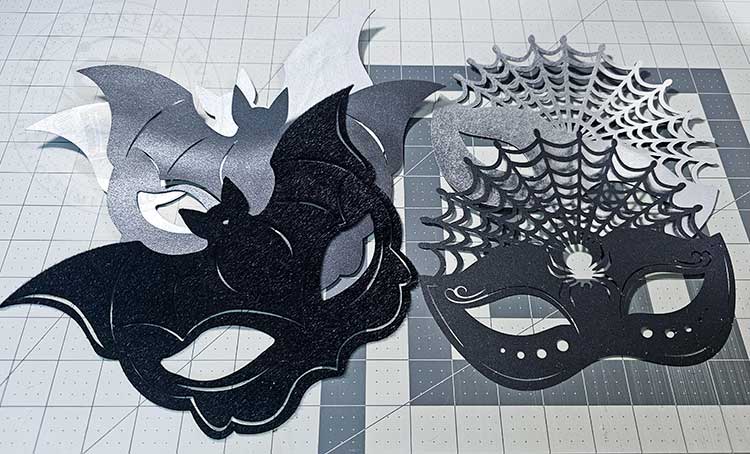
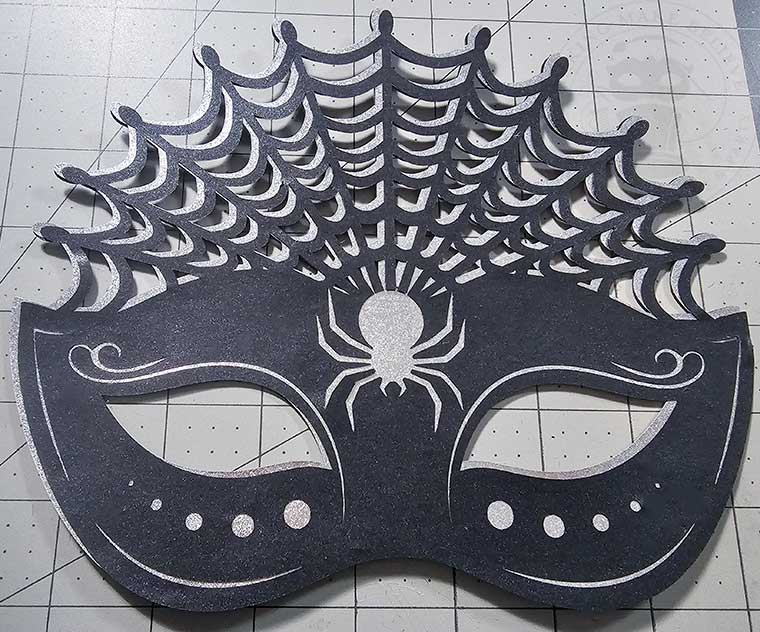
For the Spider Crown Masquerade Mask, I used a solid black and a silver foiled cardstock and glued them together using Bearly Art Precision Craft Glue to secure all the delicate webbing cutouts.
The mask is designed to align the top layer directly with the bottom, but I like to live dangerously, so I opted to slightly offset the top layer, which gives the mask the illusion of a shimmery shadow.
For the bat mask, I selected two complementary cardstocks for the middle and bottom layers, which I adhered with liquid glue, aligning the layers along the edges.
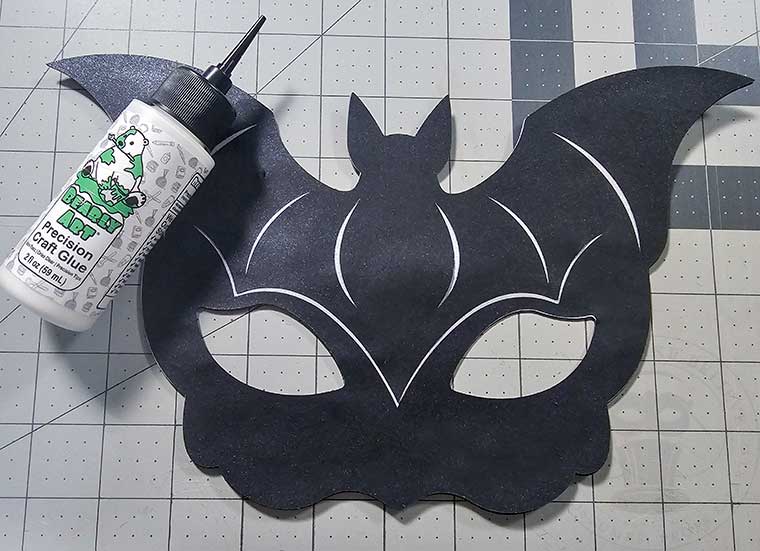
Next, aligning the cutouts, add the top layer.
Here’s where I used the faux horse hair felt. It is a heavier, fabric-like material, so I opted for a glue stick. Two glues I really like are UHU and Elmer’s Extra Strength Craft Glue.
I love how the faux horse hair felt gives the bat mask a flocked look without the mess.
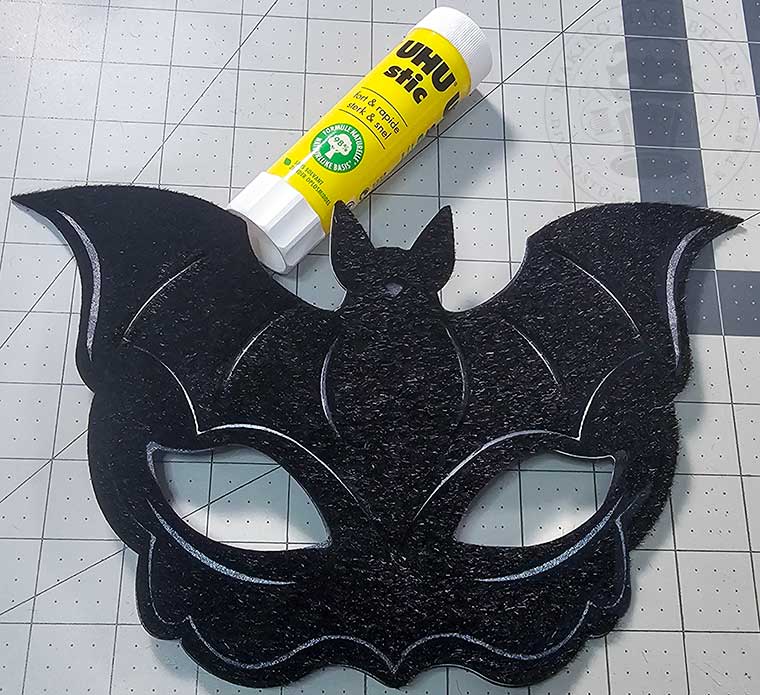
To help your mask fit your face, gently curl it from the center outward by rolling it over the edge of your table.
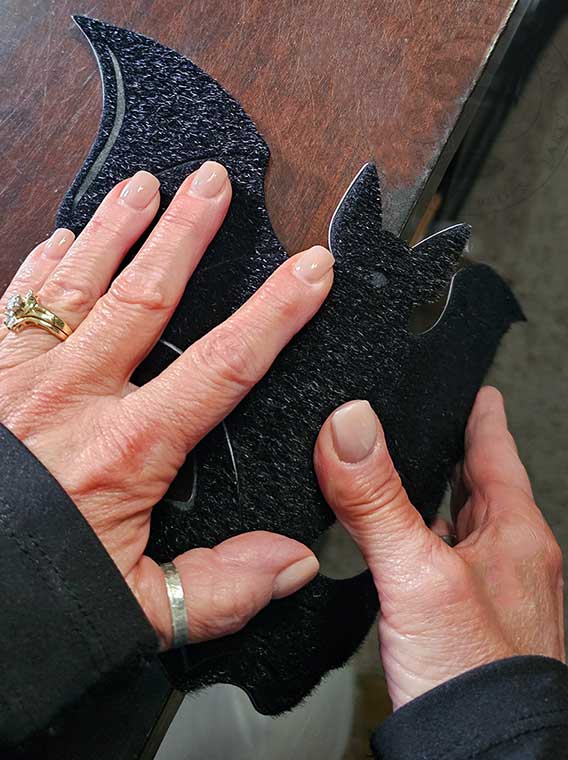
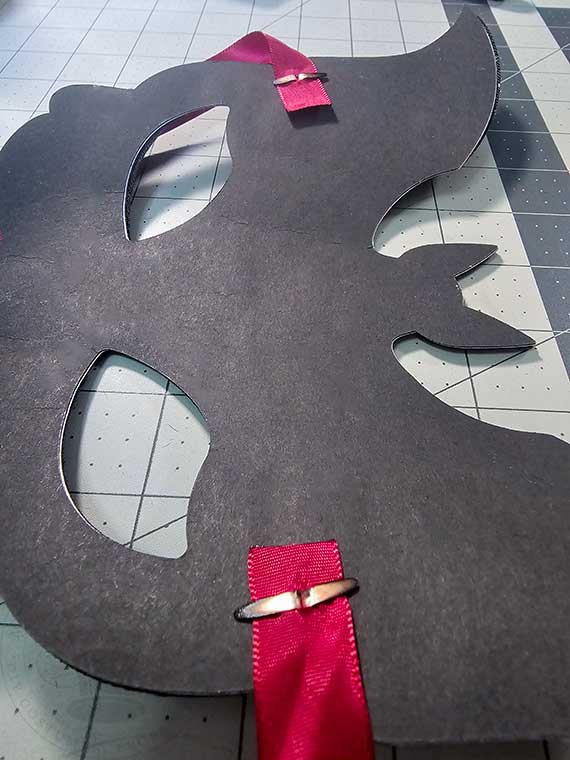
To wear your mask, create ribbon tie-backs by cutting two lengths of ribbon approximately 17-19 inches long. Next, hold the mask up to your face and note where it would be most comfortable for a ribbon tie.
To attach the ribbon, poke or punch a hole along each temple, staying away from the edge and avoiding cutouts, and at one end of each ribbon length.
Slip a brad fastener from the front of the mask, through the ribbon, and open the fastener.
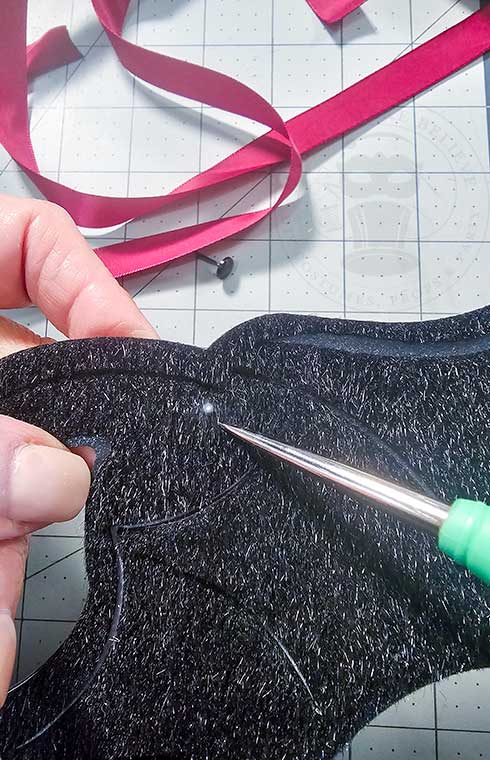
For a handheld mask, hot-glue a Venetian mask stick or a decorated dowel loaded with assorted ribbons and trims along one edge of your mask.
Oh, and did you happen to keep that leftover spider cutout from the center of the mask? He fits perfectly perched at the top of the stick.
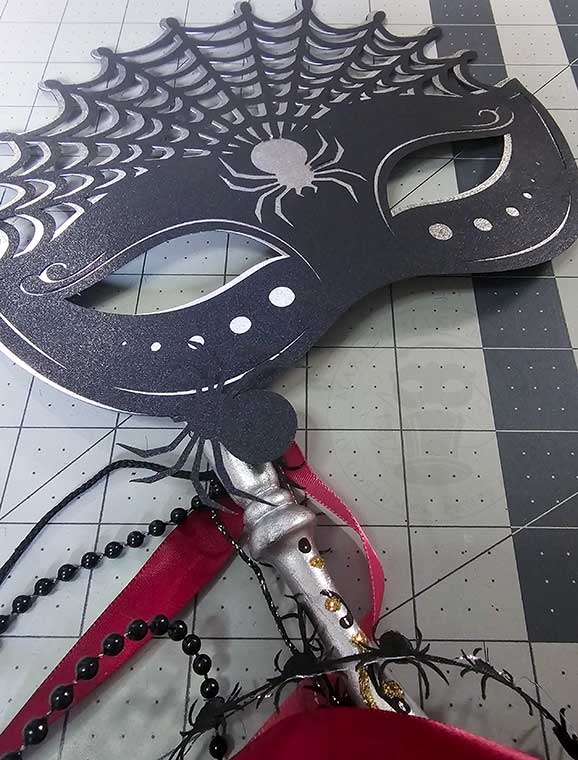
Your masks are ready to go!
But, wait, there’s more! If you want to elevate your look, load up your masks with embellishments.
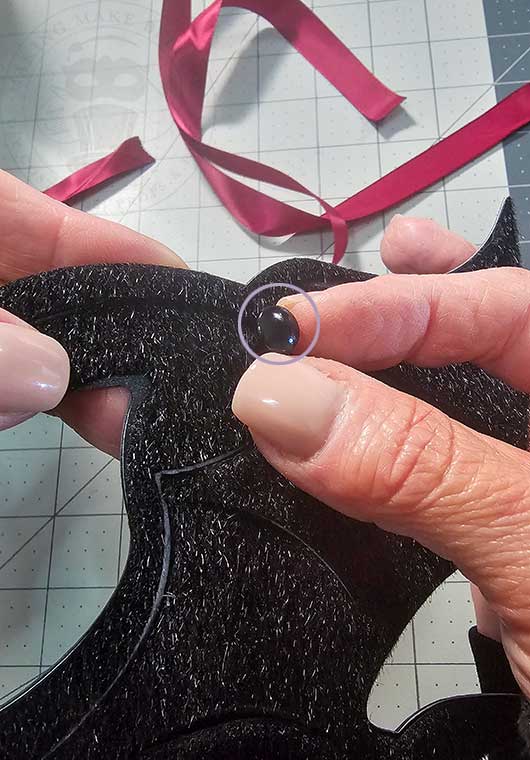
For the bat mask, I cut small circles from the faux horse hair material and covered the brad fasteners so they all but disappeared. I also attached a crimson gemstone heart over the bat’s nose for a bit of ghoulie glam.
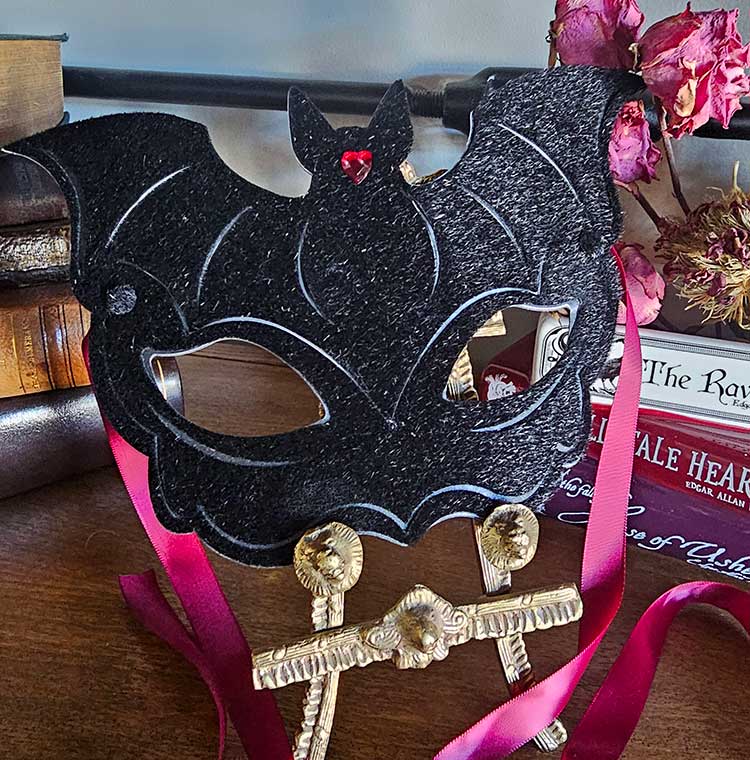
Whether you keep it simple or elevate it to elaborate, these masquerade masks will give you an air of mystery at your next Gothic Gala.
Until next time – stay spooky.

Templates, patterns and printables for every project on the blog.

Counting down to Halloween since the 1970s. I create, style and celebrate all things costume and Halloween, all year round.
Welcome to my world of Halloween Ever After, where I create, style, and celebrate all things costume and Halloween.
Within these haunted pages lie affiliate links to curious and captivating finds I love. If you make a purchase through them, I may earn a modest commission (think fun-size candy bar), which helps keep the Halloween magic alive. No extra cost to you – cross my batty heart.



Check your email for the Haunted Library password.
Don’t miss a moment of the mischief.
Add hello@halloweeneverafter.com to your address book.
The magic happens right here in my studio and office. When you step inside my creative space, you’ll find an ever expanding gallery wall overflowing with original spooky art and classic Halloween LPs, right alongside a haunted cabinet packed to the brim with vintage curiosities.
It’s under the watchful eyes of these retro treasures that I design and craft.
Join us and get access to our Haunted Library stocked with templates, printables, cut files, and exclusive content. Plus, you’ll receive Eerie Emails just for our subscribers.
*Stay as long as you like. Unsubscribe at any time.


