Free templates & patterns
130+ freebies are waiting in the Haunted Library
Templates, patterns and printables for every project on the blog.
Formerly Making Make Believe · Join the Haunted Library

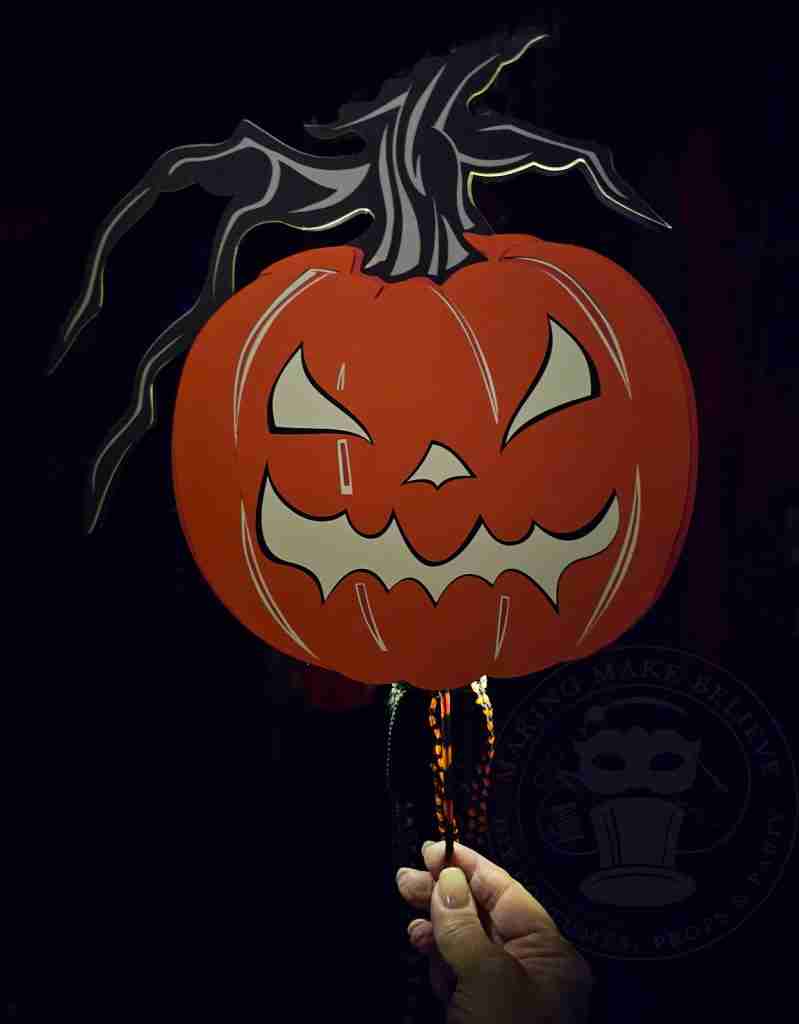
Spooky Jack O’Lantern Halloween Decoration
As an Amazon Associate I earn from qualifying purchases.
This post may contain affiliate links for your convenience. Click here to read our disclosure policy.
When working on a project’s supply list, I may not know the proper name of the item I need, and sometimes, I’m uncertain if the item even exists.
My plan of attack is to hit the stores and walk aisles looking at anything and everything that might do the trick.
And, heaven help the poor sales associate who approaches me in an effort to help me locate a nameless, possibly non-existent widget.
Just last week, I popped into Hobby Lobby for a large paper mache disc for a project I wanted to make. Of course, this item didn’t exist in the store, so I zig-zagged each aisle, looking for a suitable substitute.
As I exited the cake section, some corrugated plastic cake boards caught my eye and reminded me of another idea from my Want To Do List, so I grabbed a pack.
Since the first project is still in limbo, I decided to use my new cake boards to create a spooky Jack O’ Lantern Halloween decoration that comes together quickly with a bit of cardstock and glue.
So, let’s get started.
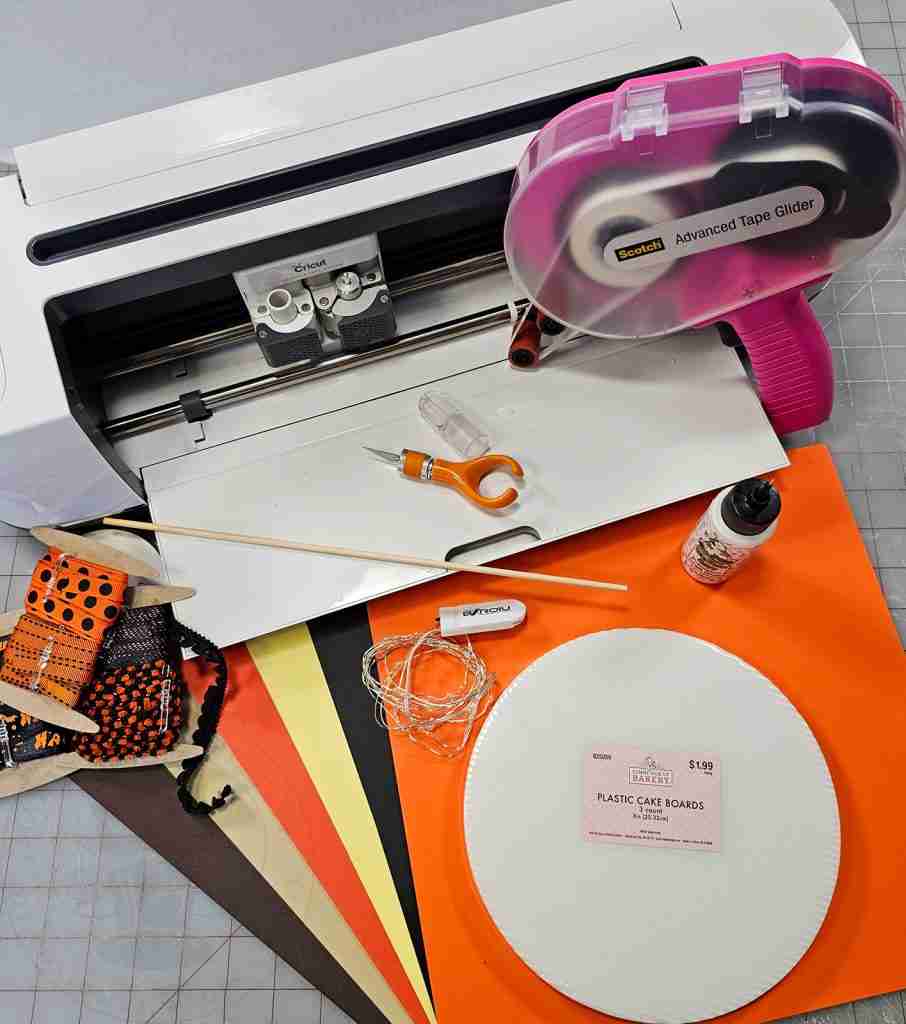
For this project, we will need:
12″x12″ cardstock (one of each color for each JOL) – dark brown, light brown, dark orange, medium orange, and light yellow
2 – 12×12 cardstock in black
Cutting machine or finger blade
Adhesive – I recommend the Scotch Adhesive Glider or Elmer’s Craft Bond Glue Stick
Bearly Art Precision Craft Glue (optional)
Corrugated plastic cake board smaller than your Jack O’Lantern
Wooden craft dowel
Ribbons & embellishments as desired
String lights (optional)
We will also need the Jack O’ Lantern Spooky Stick template from the Haunted Library.

Choose the PDF if you want to cut by hand or the SVG if you prefer machine cutting.
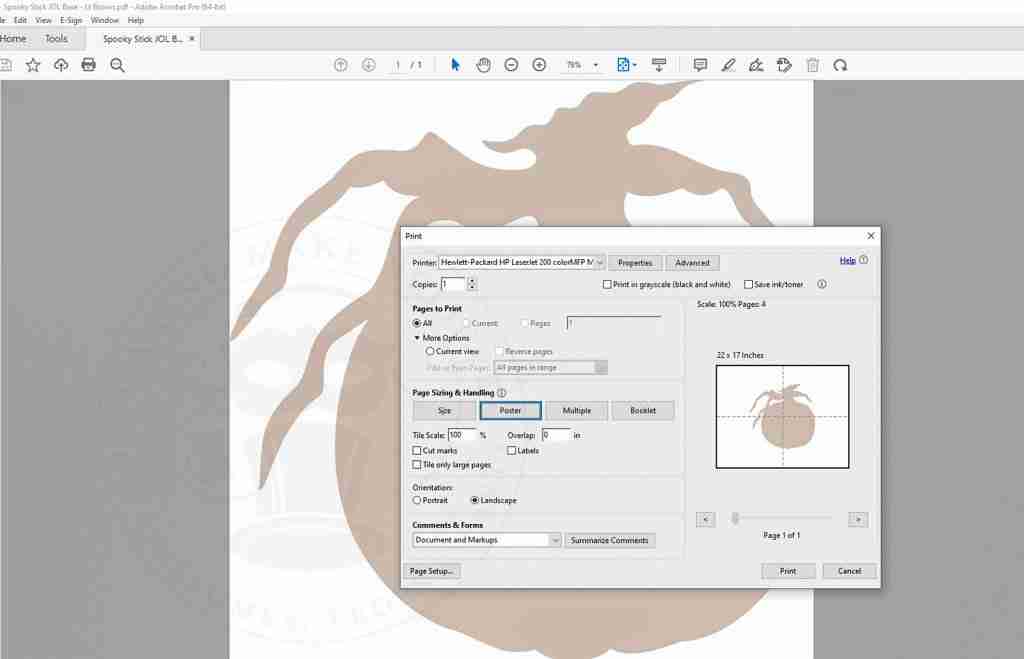
If you are hand-cutting, open the file in your favorite PDF reader (Adobe, FoxIt, etc.).
Ensure that the print settings are for Actual Size and select the Poster option under Page Size and Handling.
Then, print each page onto white copy paper or cardstock.
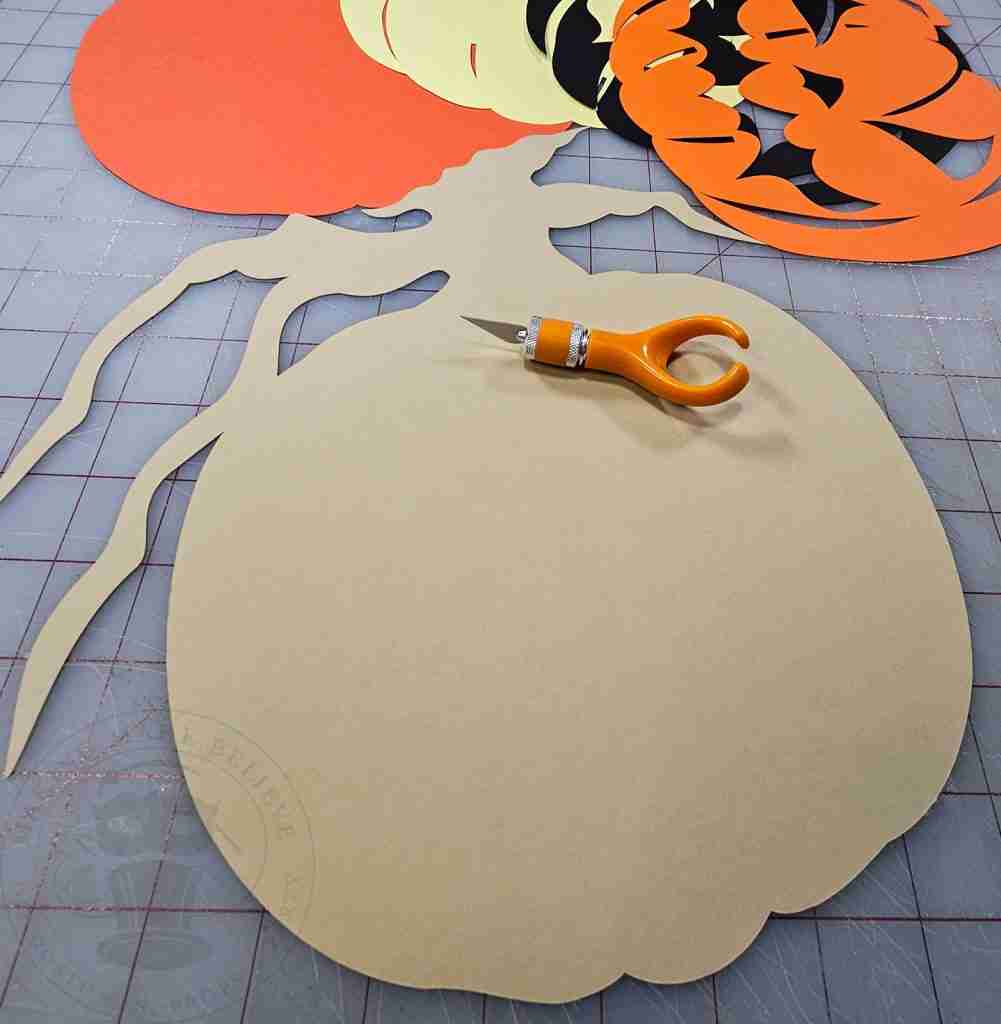
Trace each pumpkin part onto the corresponding color of cardstock and cut it out using the finger blade.
If you are machine cutting, upload the SVG file to your design software, such as Cricut Design Space.
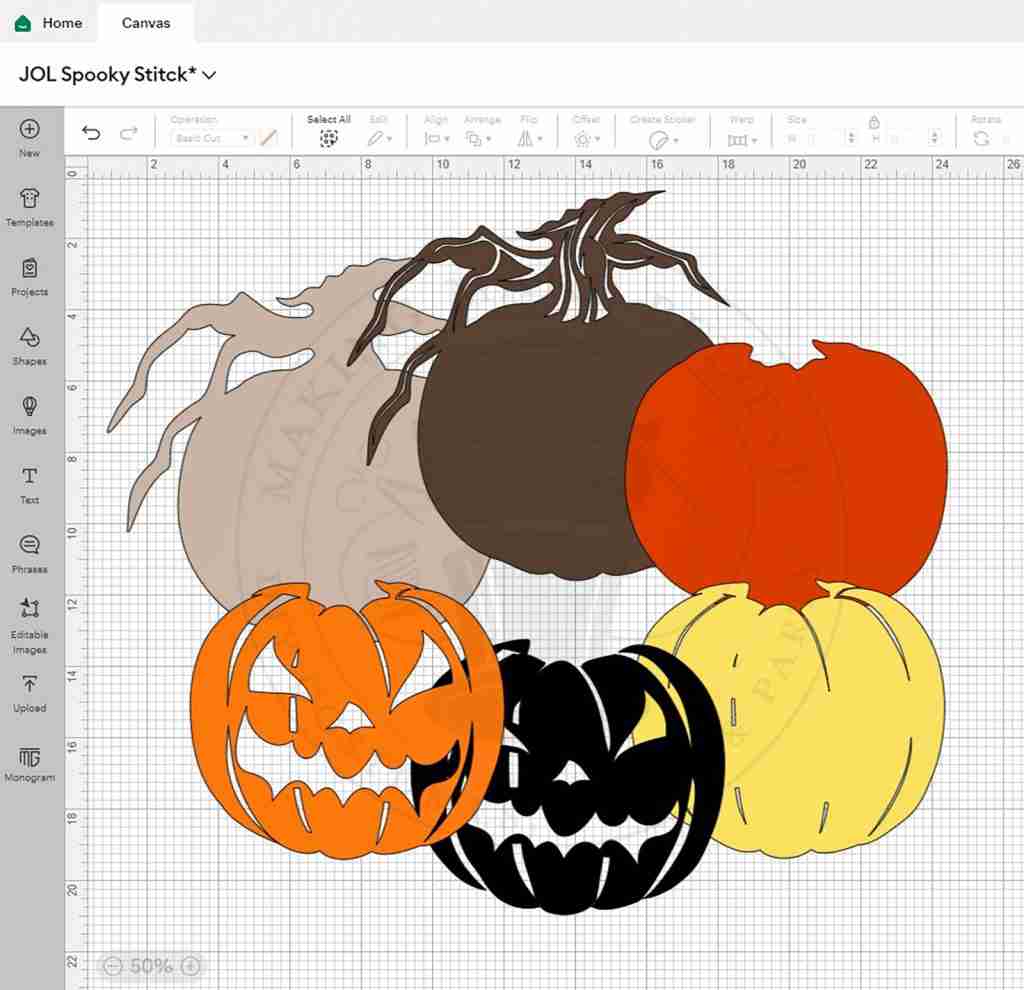
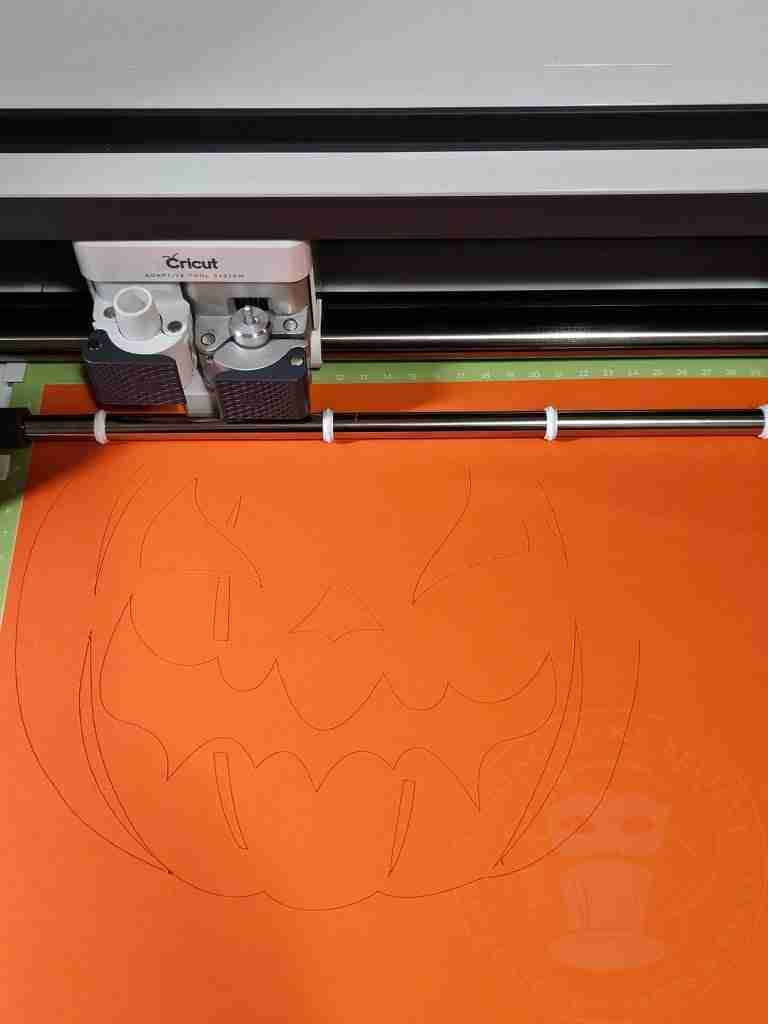
Resize if desired, then ungroup the pumpkin parts and cut each from their corresponding color of cardstock.
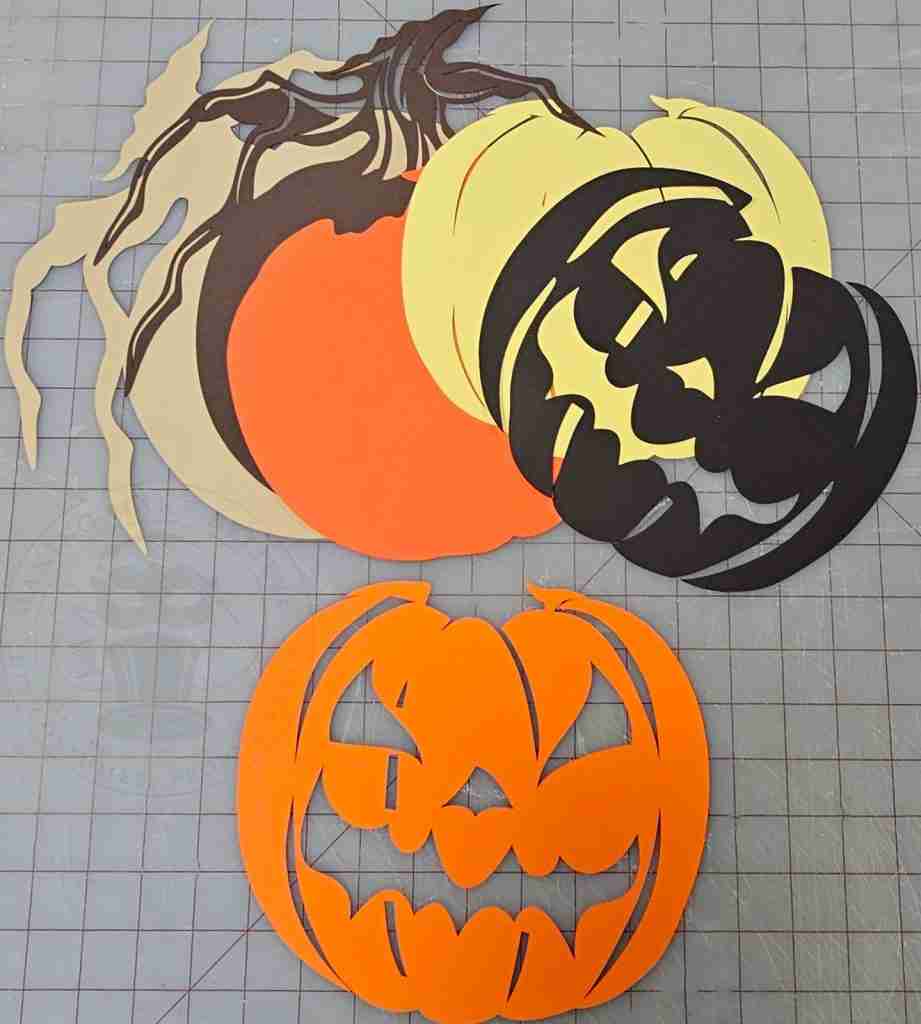
To assemble the Spooky Stick, glue the dark brown piece on top of the light brown piece.
I like to use Bearly Art Precision Craft Glue for the areas around the detailed cutouts, but as the glue dries fast, I first use Scotch Adhesive for the larger, non-detailed areas.
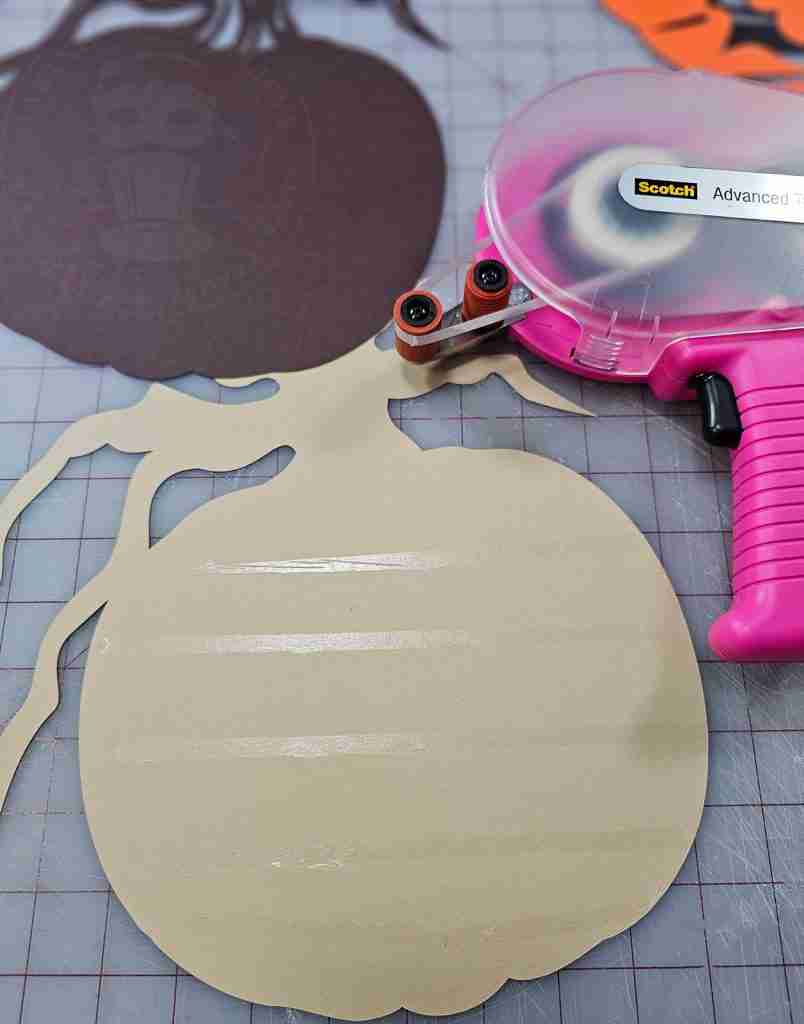
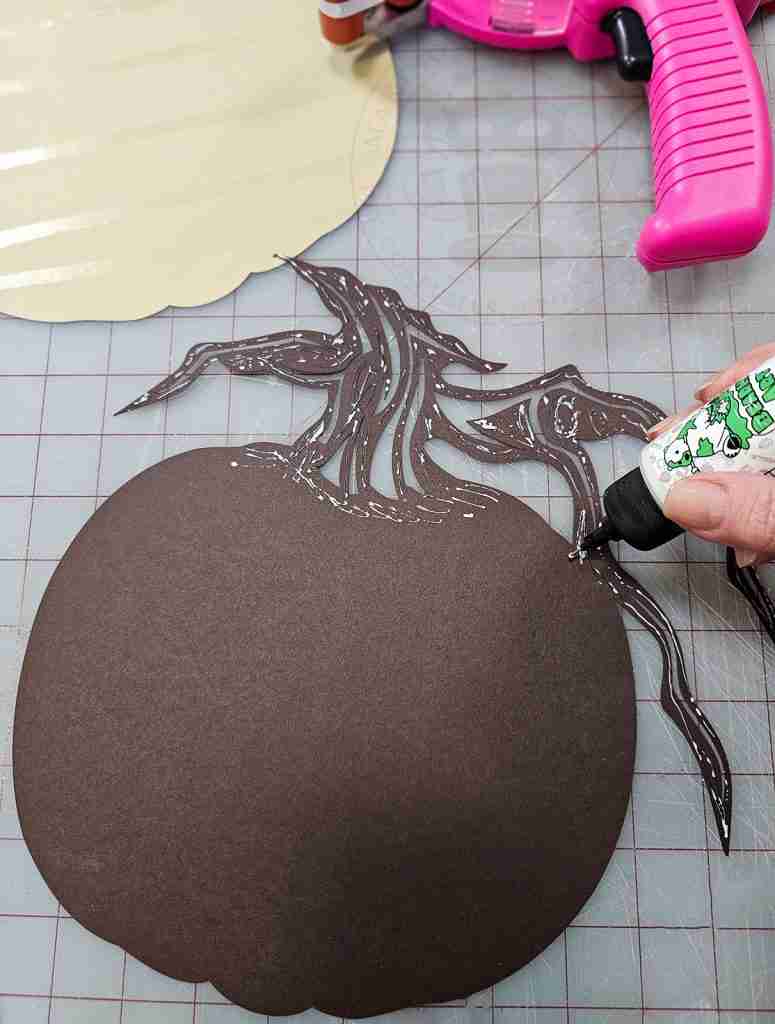
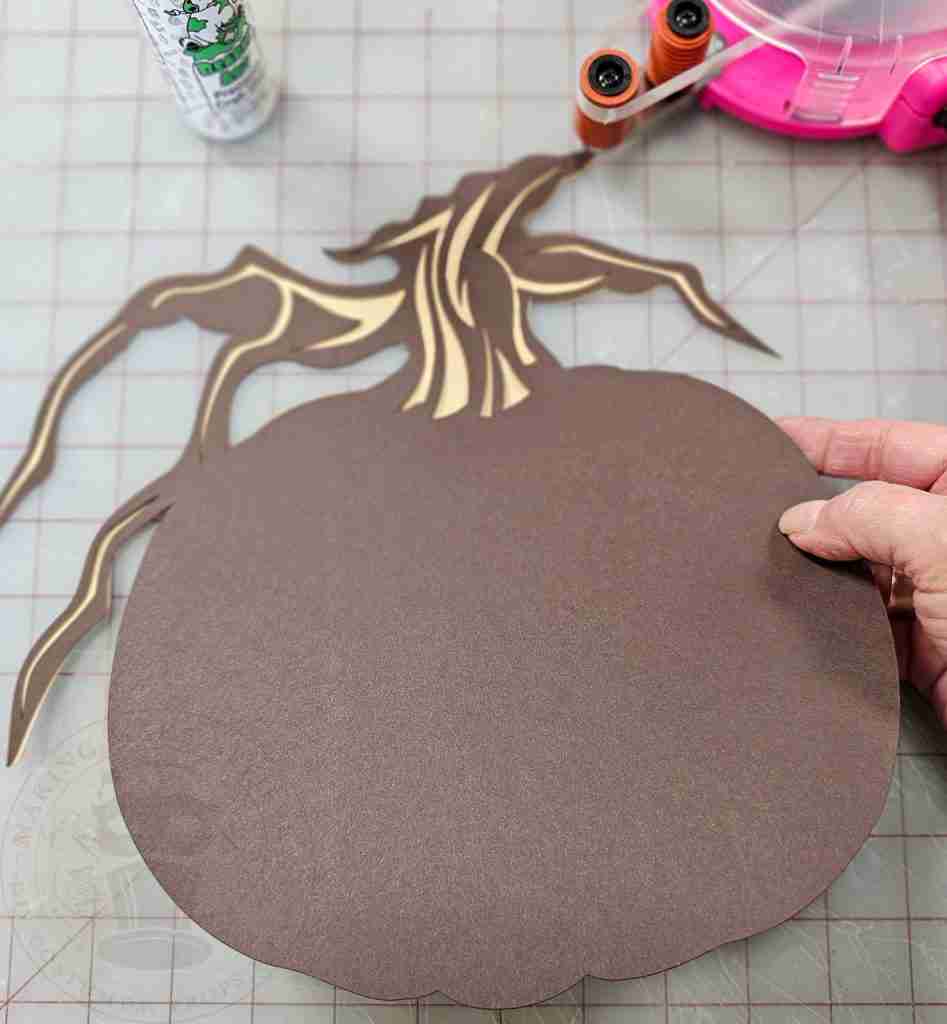
Then, aligning the center bottoms, glue the dark orange pumpkin on top of the brown stack.
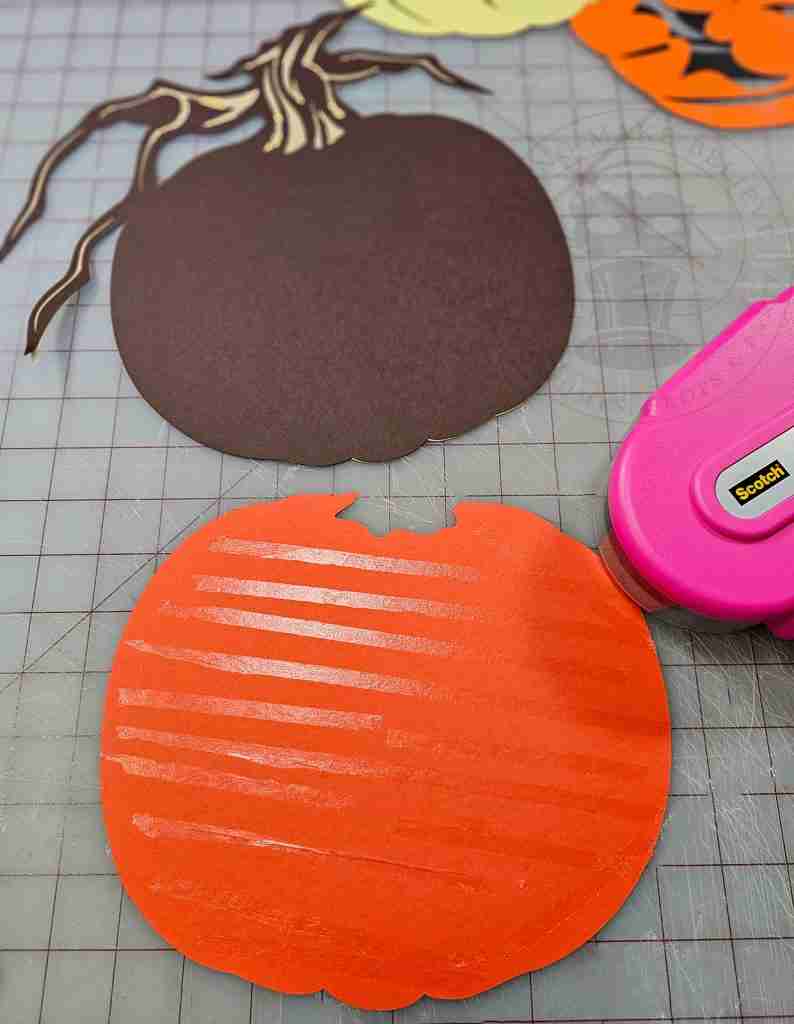
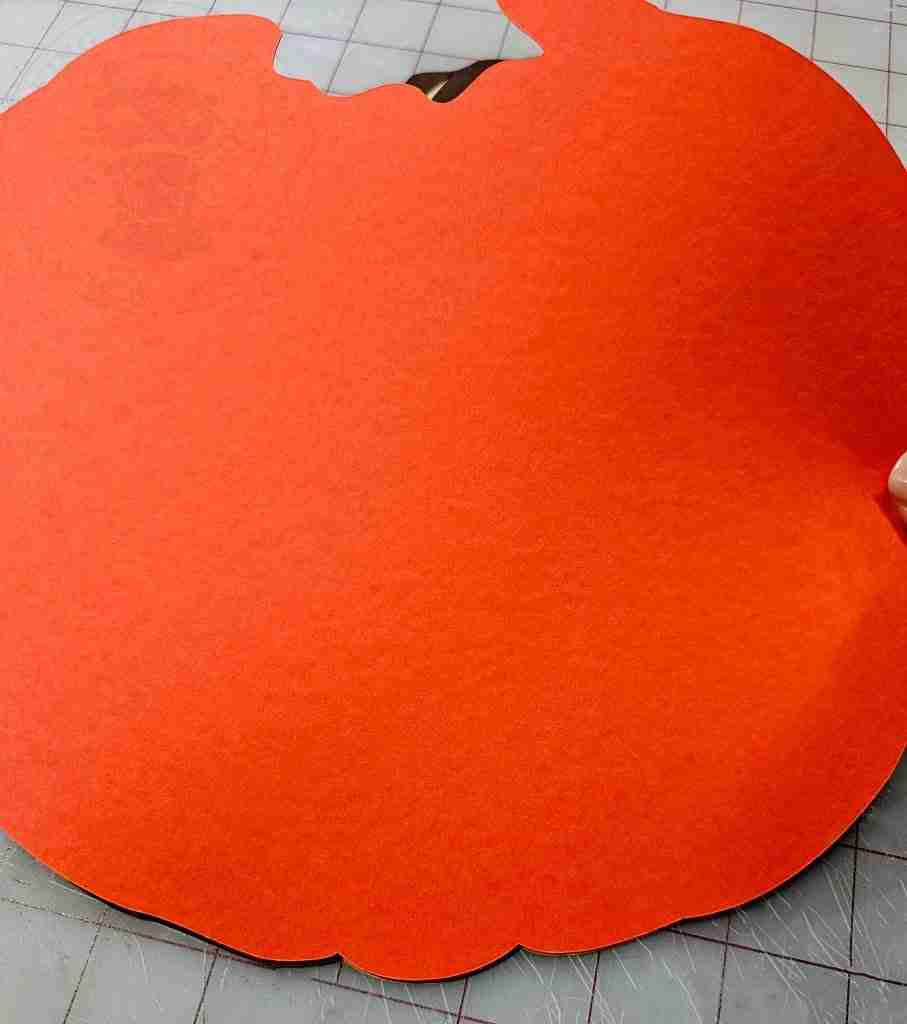
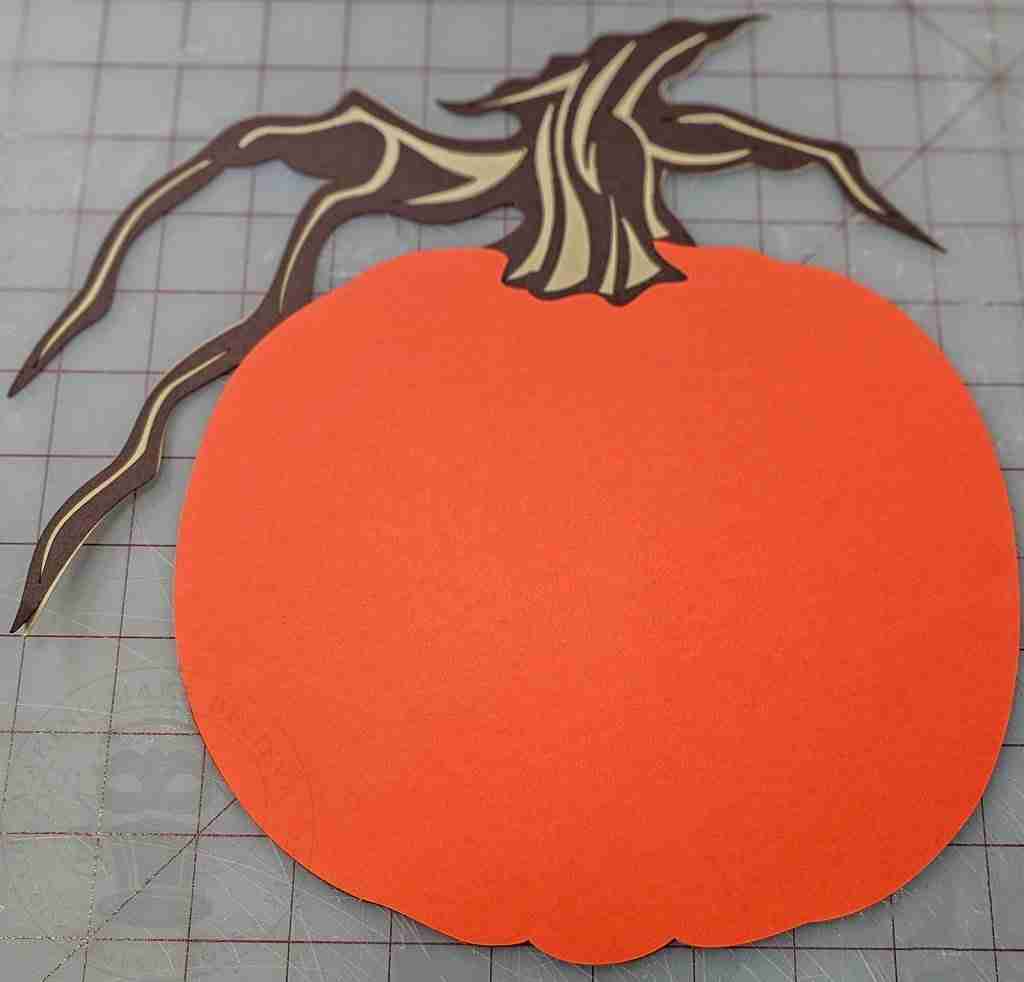
Next, add adhesive to the yellow pumpkin piece.
Align the center bottom of the yellow piece to the stack and press it into place.
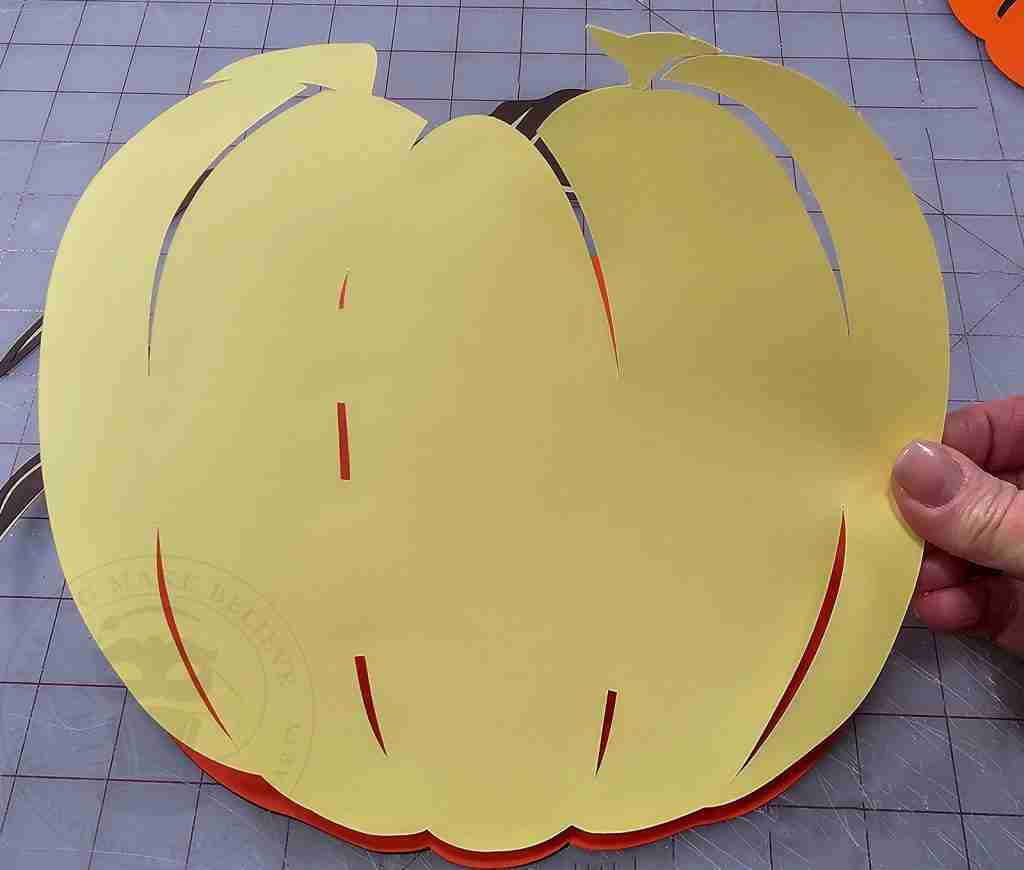
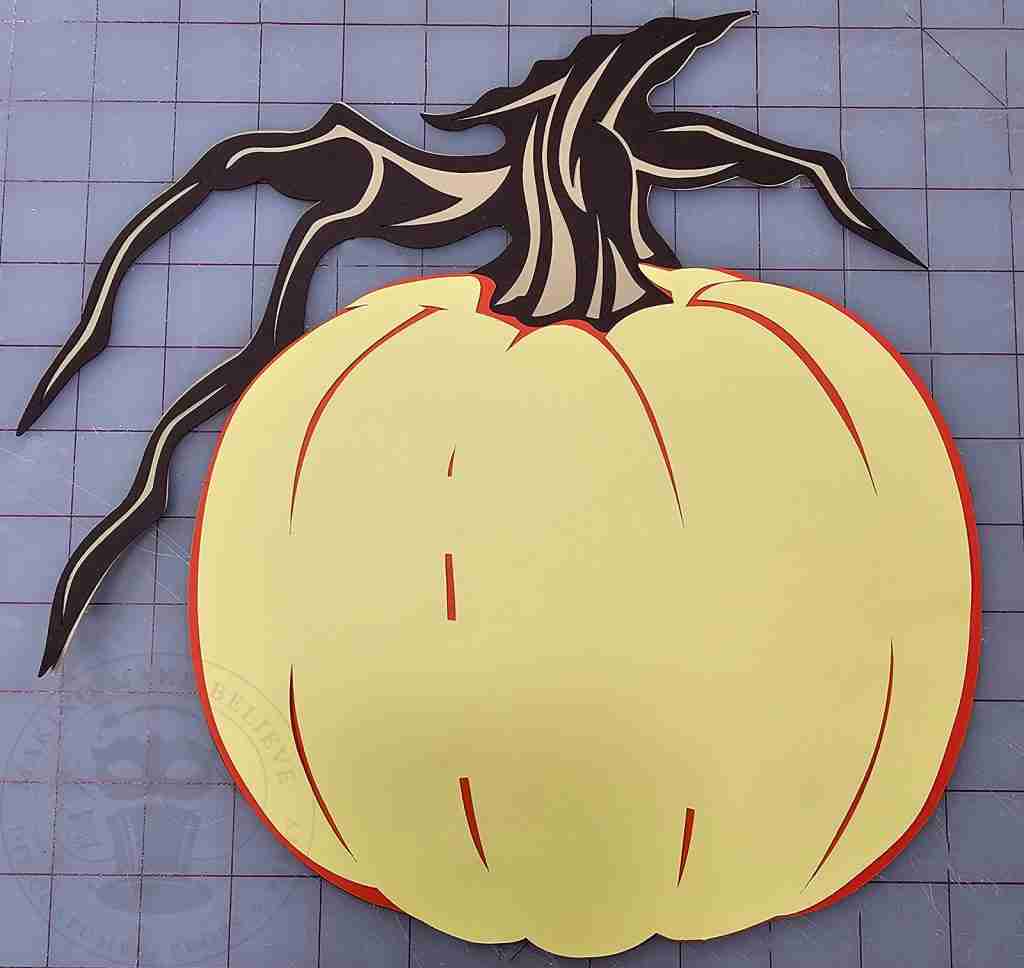
Now, add adhesive and glue to the pumpkin face shadow piece.
Line the bottom center of the shadow piece to the stack and attach.
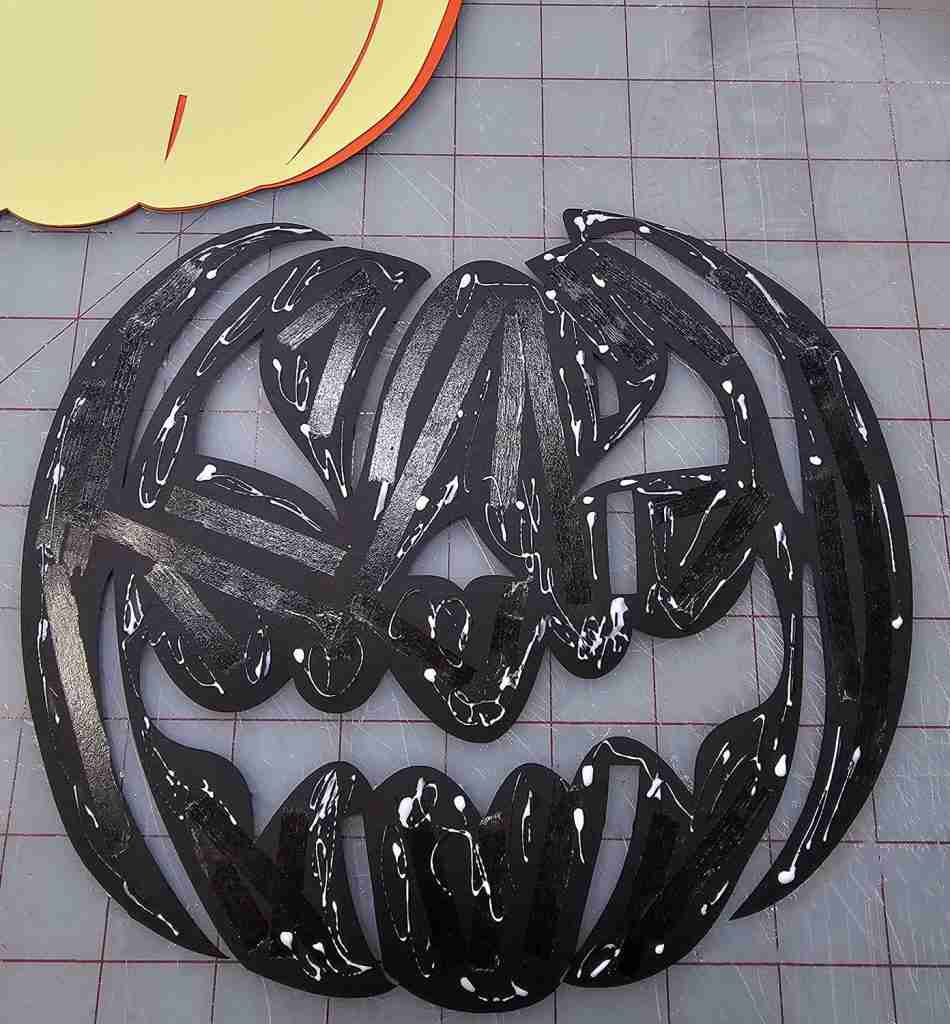
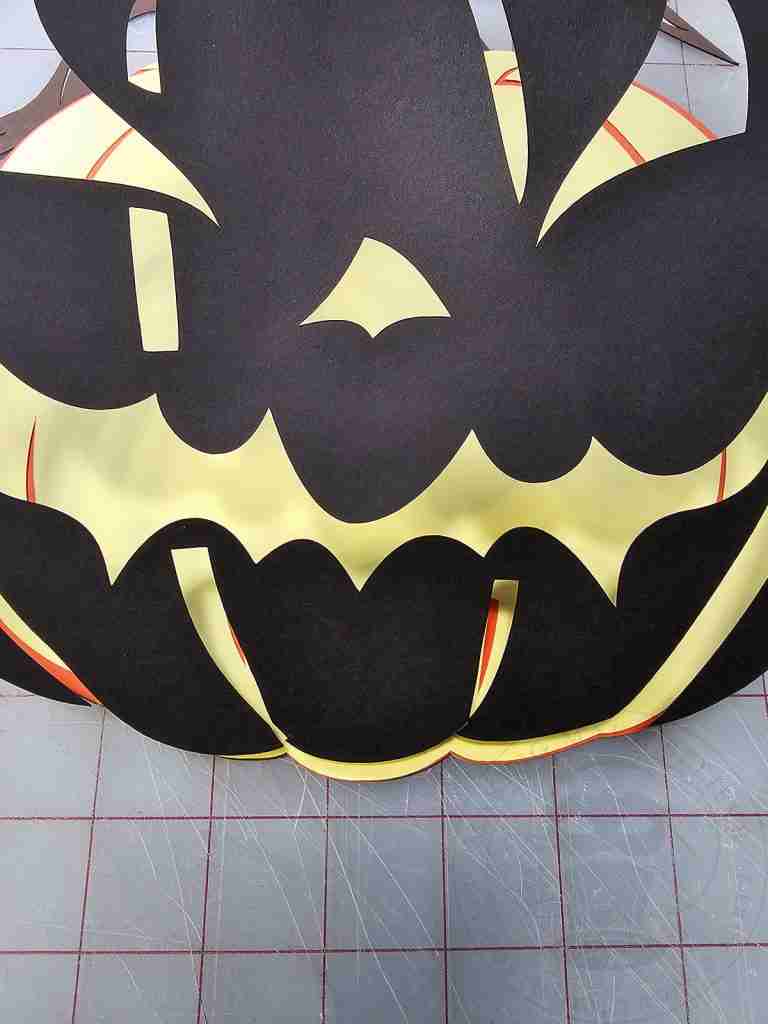
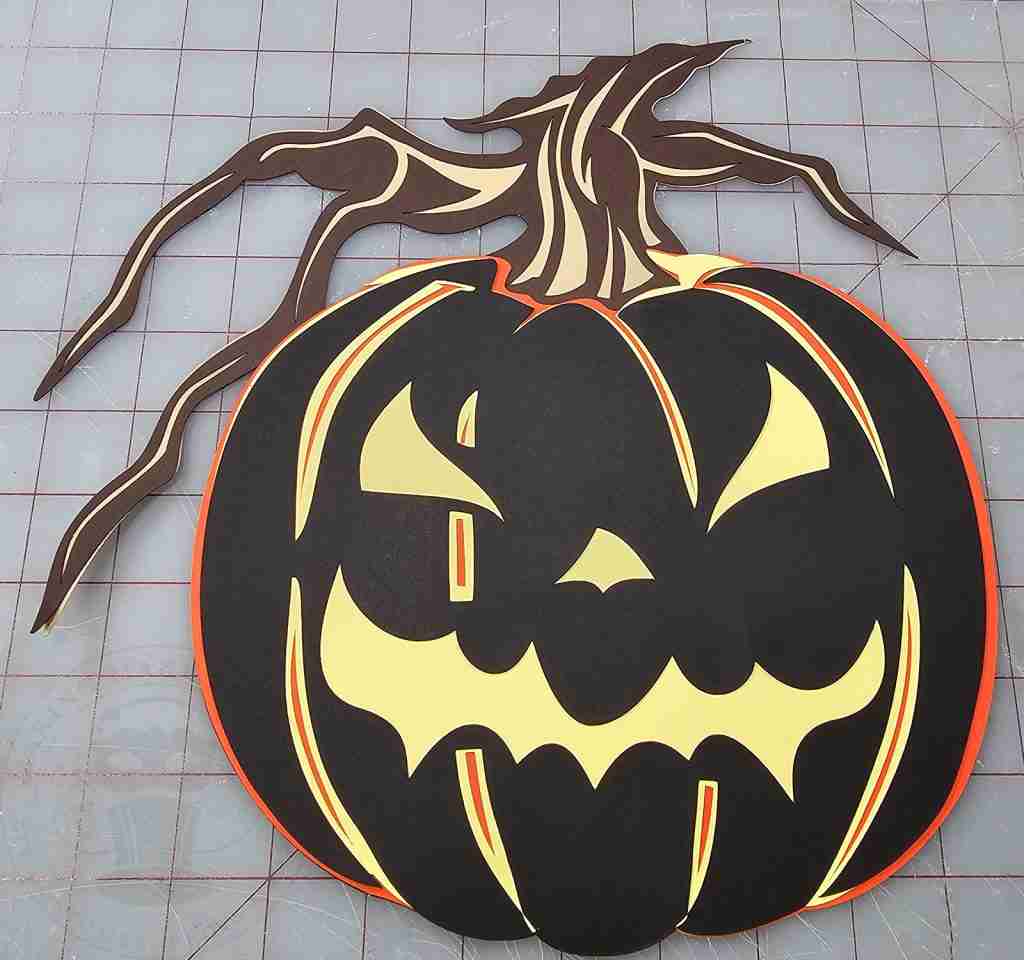
Finally, glue the orange pumpkin face, again aligning the center bottoms, onto the stack.
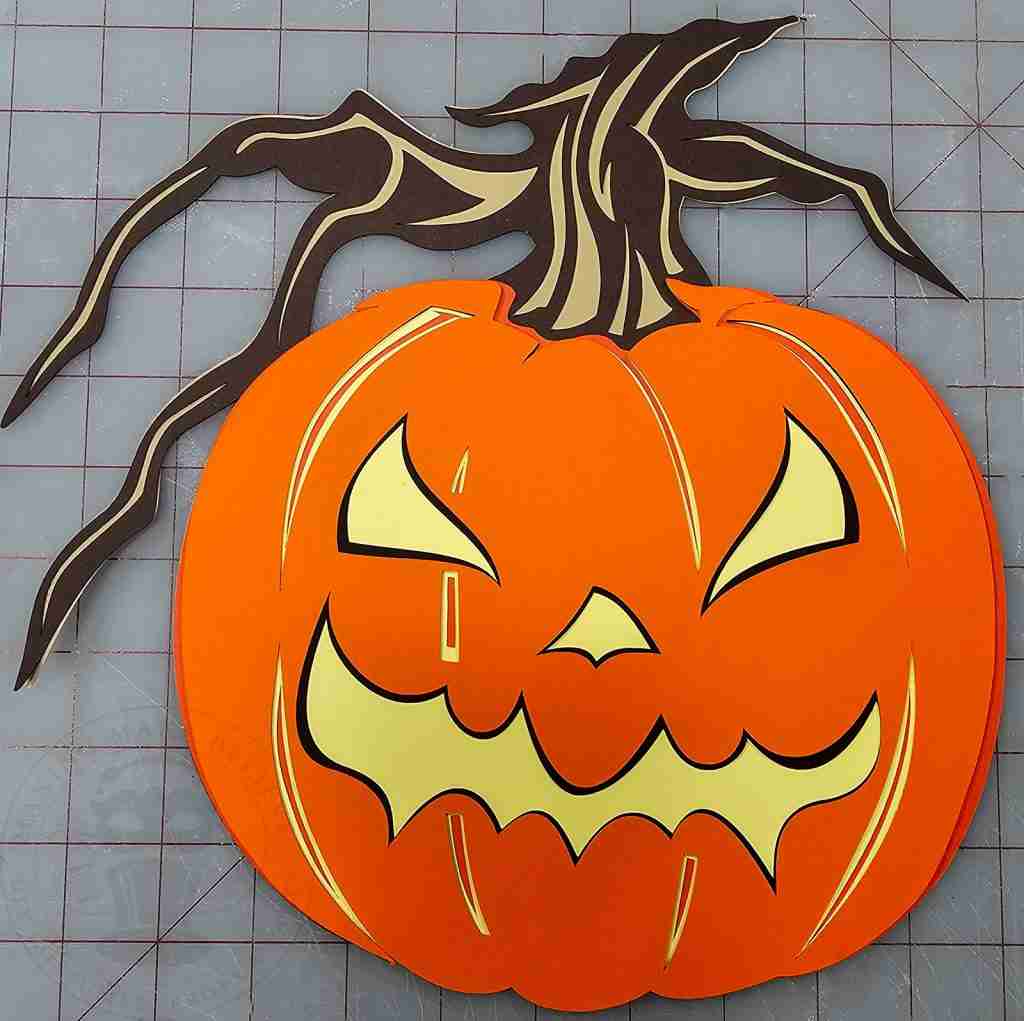
If using an 8-inch cake board, cut it down to make room for lights (optional), or select a slightly smaller board.
Then, insert the dowel into the cake board.
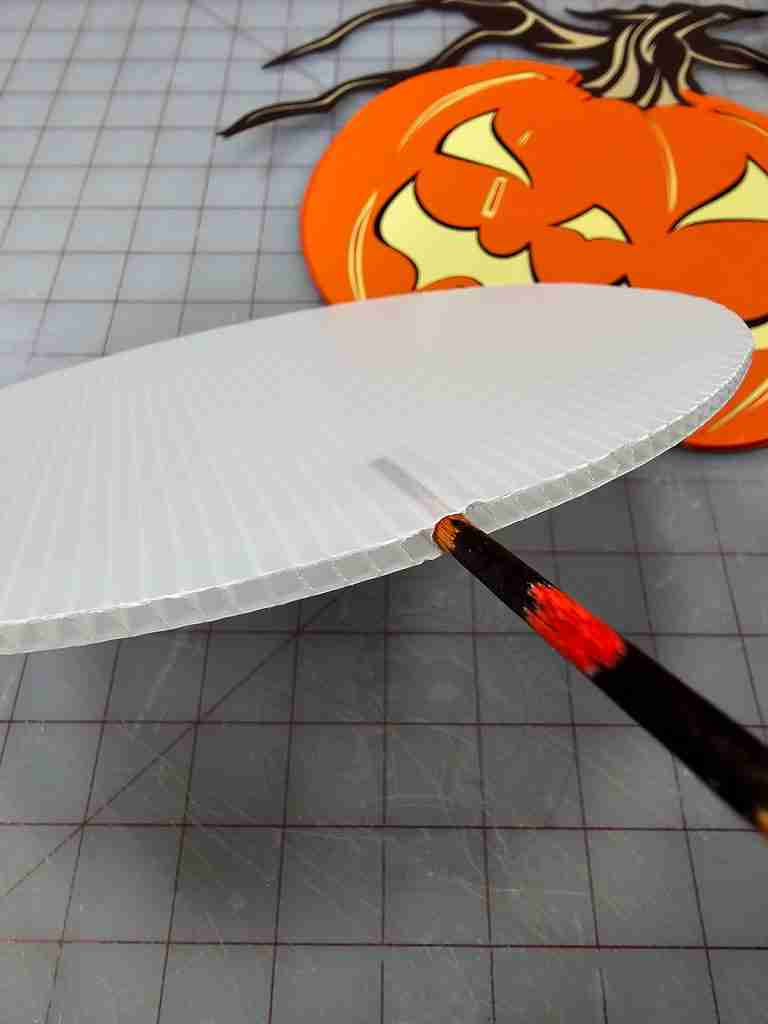
Center the assembled Jack O’Lantern on the cake board and glue it into place.
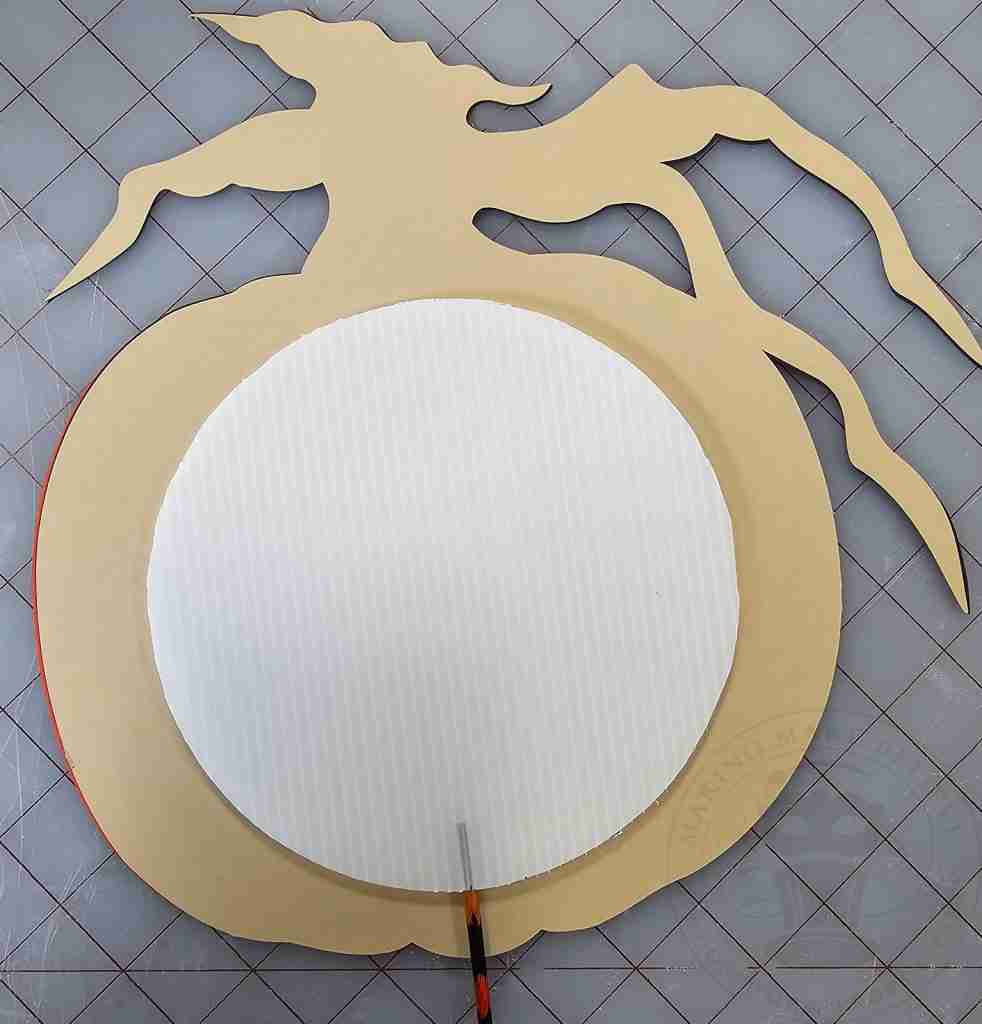
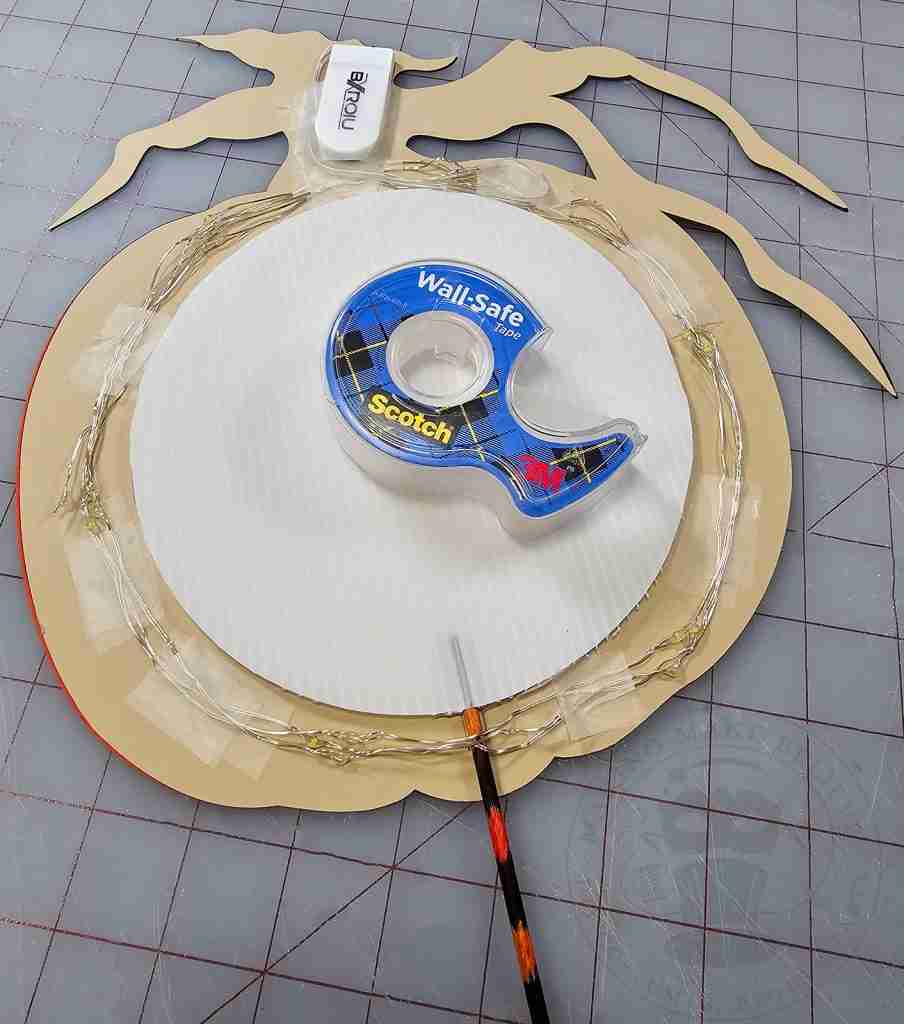
For a spellbinding touch, secure tiny string lights to the back of the stack around the cake board with tape.
I chose this set of lights from Amazon due to the flat and compact size of the battery compartment, and it worked perfectly.
To finish the back, cut another base piece from black cardstock and glue it to the cake board.
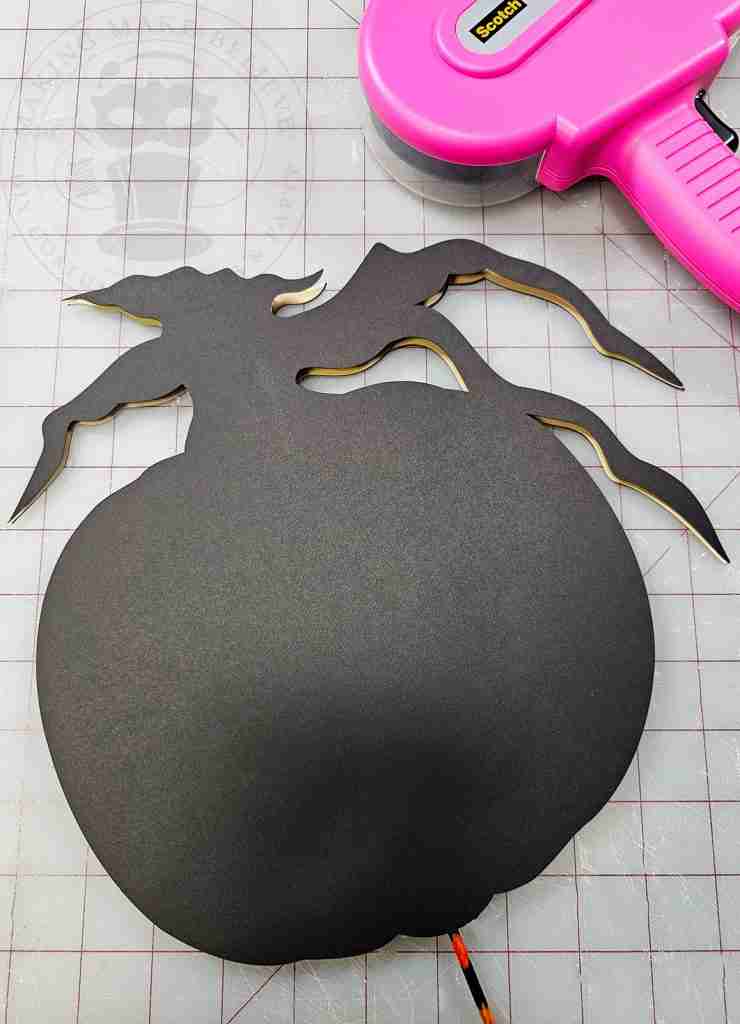
Lastly, glue ribbon, festooning, or other embellishments around the dowel at the base of the pumpkin.
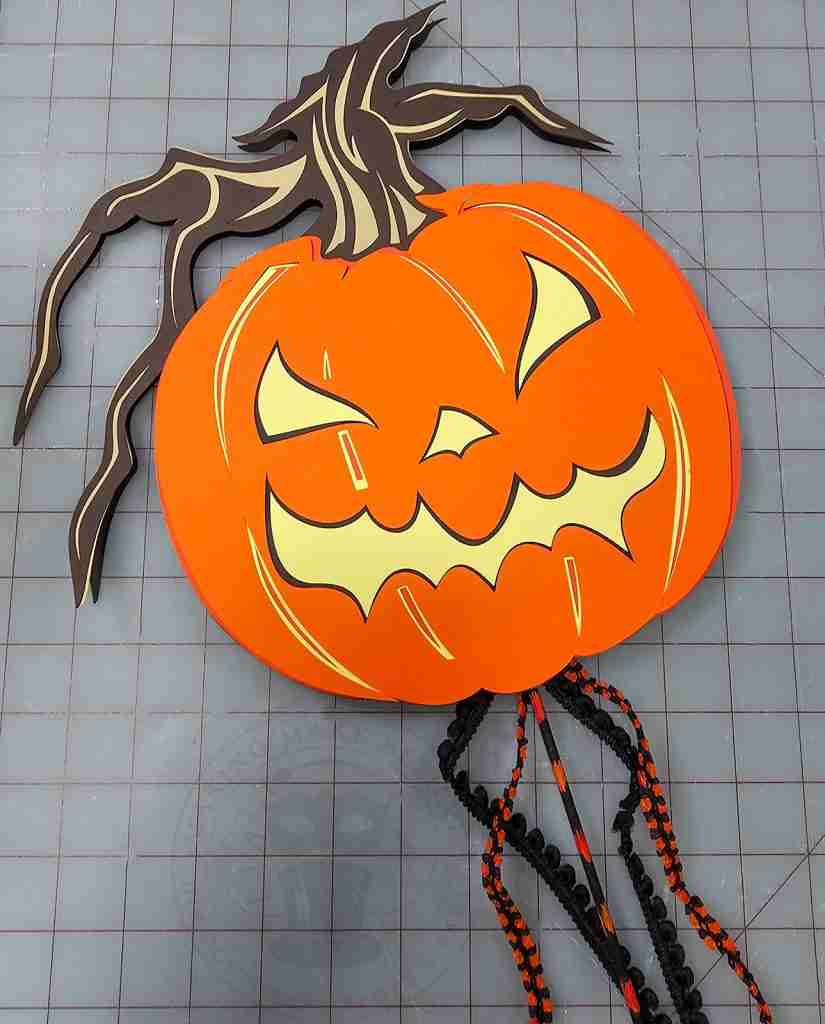
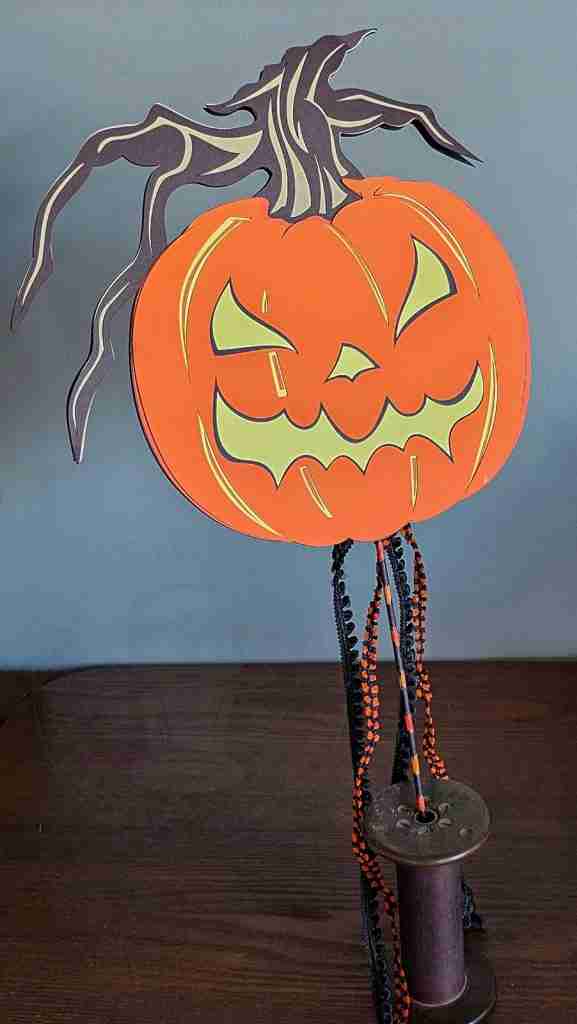
Now, you can use the Spooky Stick as a Jack O’ Lantern Halloween decoration or as a costume prop.
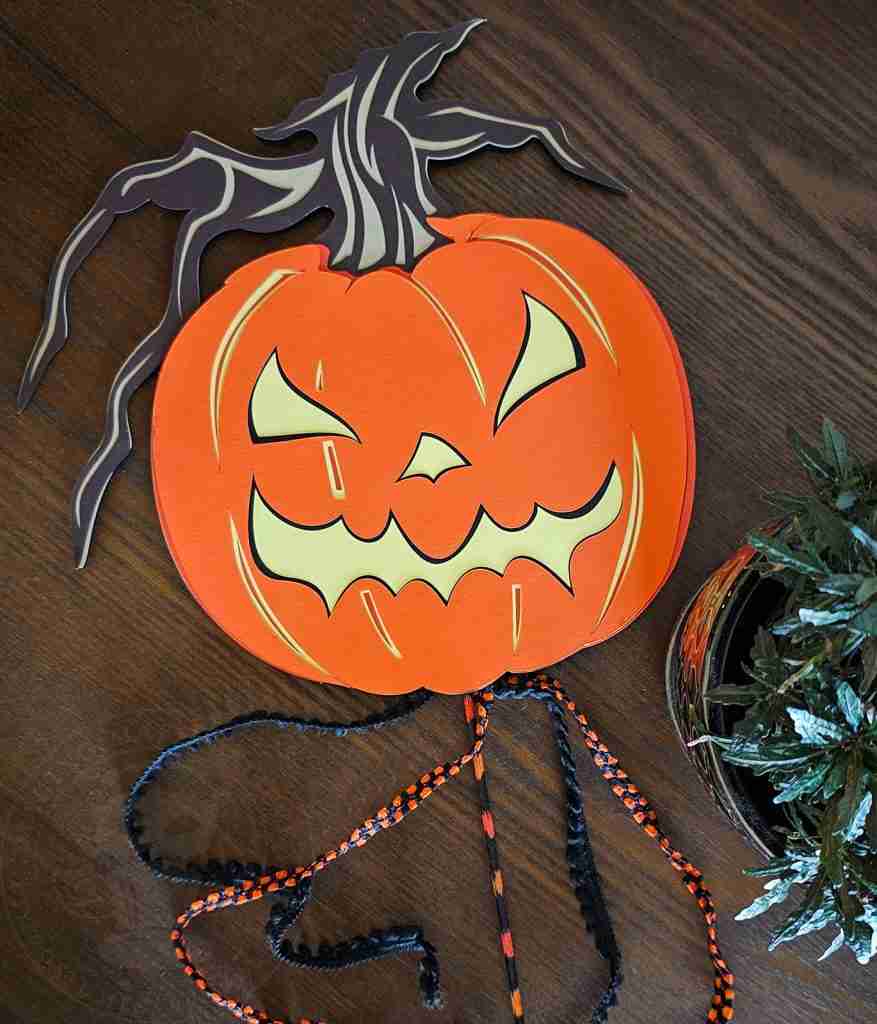
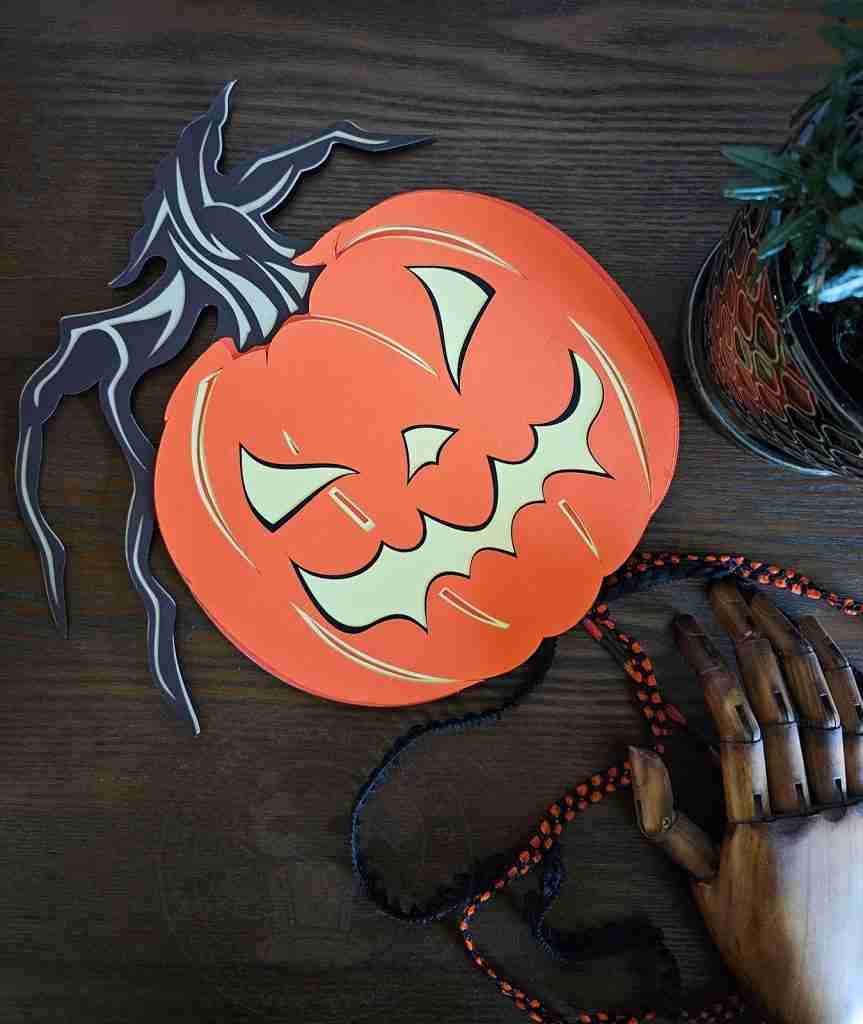
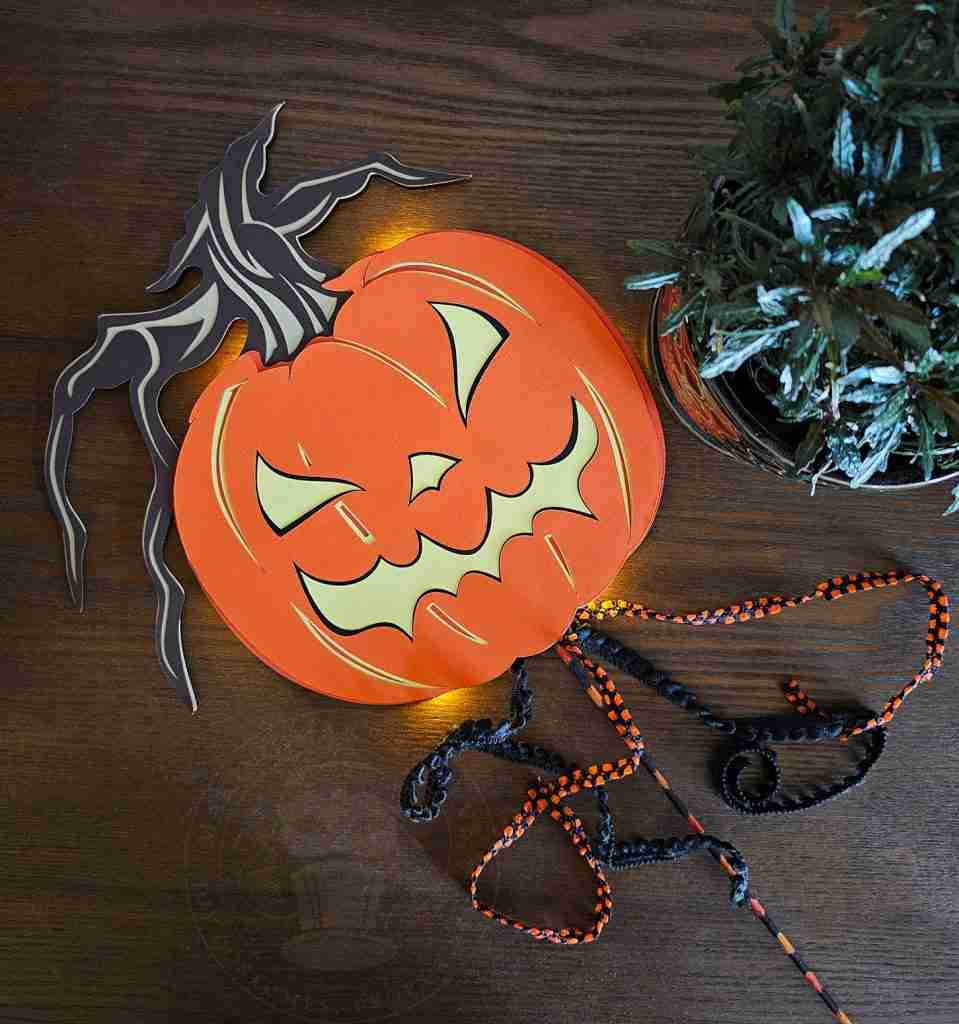
Fun, fast, and easy!
Until next time – keep it spooky.

Templates, patterns and printables for every project on the blog.

Counting down to Halloween since the 1970s. I create, style and celebrate all things costume and Halloween, all year round.
Welcome to my world of Halloween Ever After, where I create, style, and celebrate all things costume and Halloween.
Within these haunted pages lie affiliate links to curious and captivating finds I love. If you make a purchase through them, I may earn a modest commission (think fun-size candy bar), which helps keep the Halloween magic alive. No extra cost to you – cross my batty heart.



Check your email for the Haunted Library password.
Don’t miss a moment of the mischief.
Add hello@halloweeneverafter.com to your address book.
The magic happens right here in my studio and office. When you step inside my creative space, you’ll find an ever expanding gallery wall overflowing with original spooky art and classic Halloween LPs, right alongside a haunted cabinet packed to the brim with vintage curiosities.
It’s under the watchful eyes of these retro treasures that I design and craft.
Join us and get access to our Haunted Library stocked with templates, printables, cut files, and exclusive content. Plus, you’ll receive Eerie Emails just for our subscribers.
*Stay as long as you like. Unsubscribe at any time.


